The Cellar Tab
The Cellar tab is the place where you manage your wine cellar. You can add bottles to your cellar (organizing them as you prefer) and remove them (either by browsing the cellar or by selecting a bottle based on a variety of criteria).
- Your wine cellar is organized as one or more wine racks. (You may have as many wine racks as you wish, but you must have at least one.)
- Wine racks are organized as rows and columns of bins. A rack may have up to 26 rows, and each row may have up to 99 columns.
- On a rack-by-rack basis, you can specify the number of bottles that fit in a bin.
- For bins that contain more than one bottle, all of the bottles must be from the same vintage of the same wine. That is, bins are homogeneous.
If you have a wine fridge that you want to treat as a wine rack, you may have the problem that your fridge has shelves instead of bins. In this case, you should partition the shelves to create smaller 'pseudo-bins' that can be homogeneous.
Defining a Rack
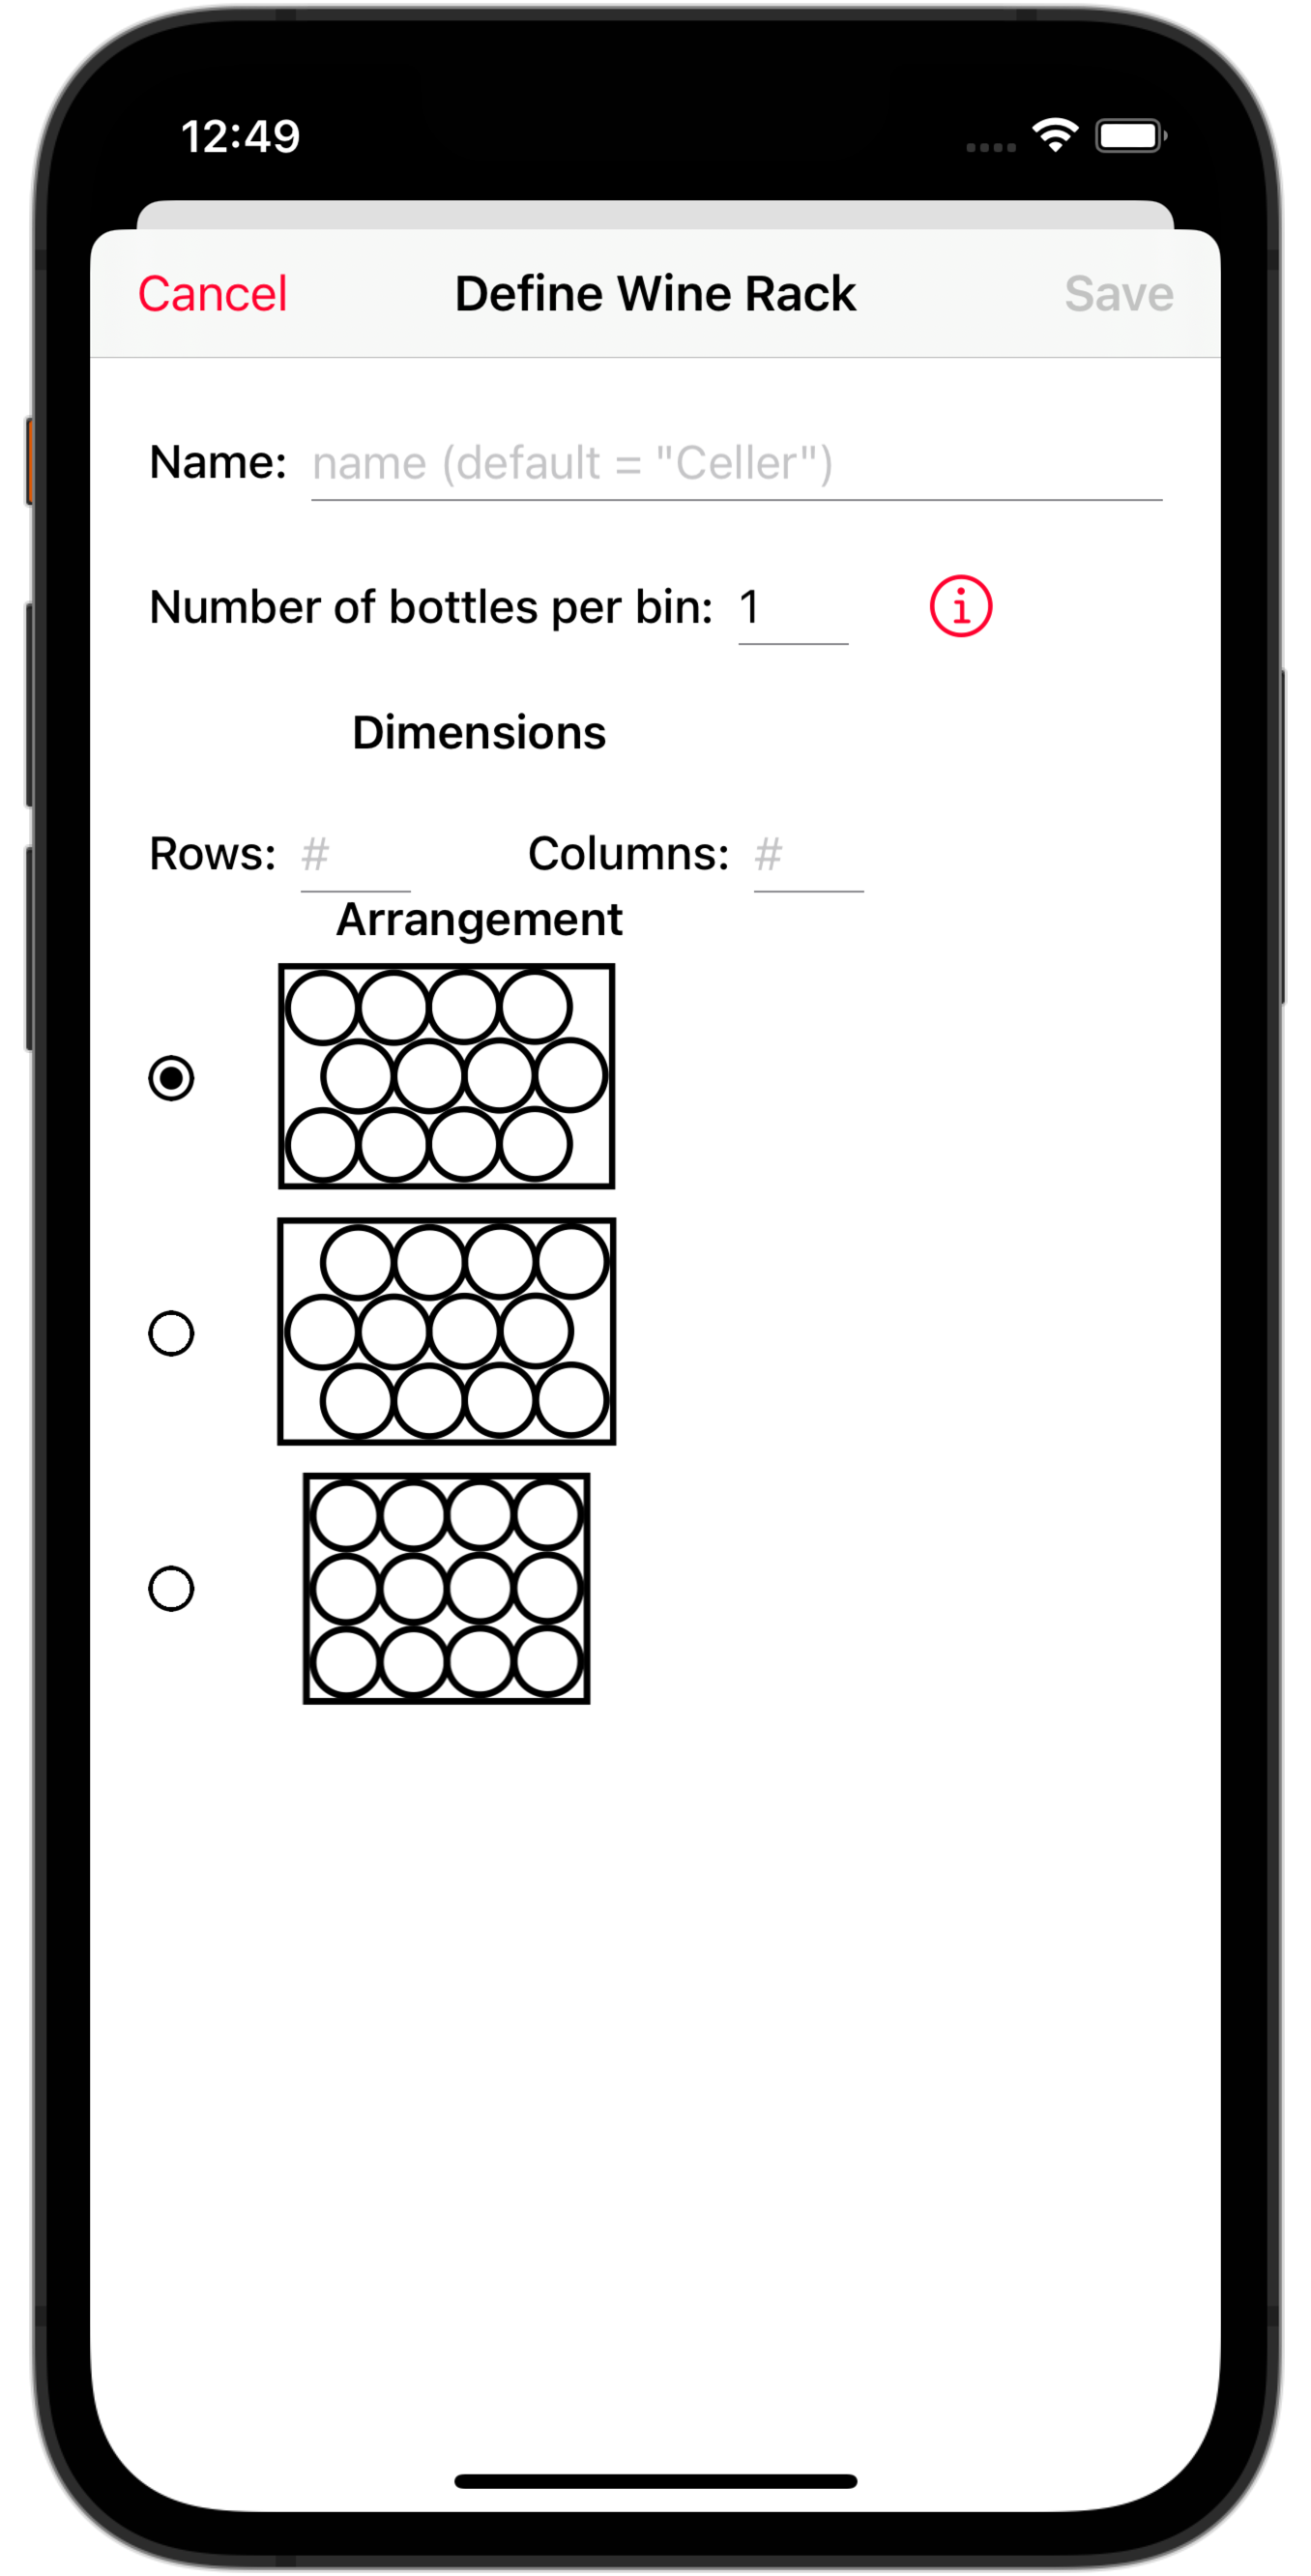
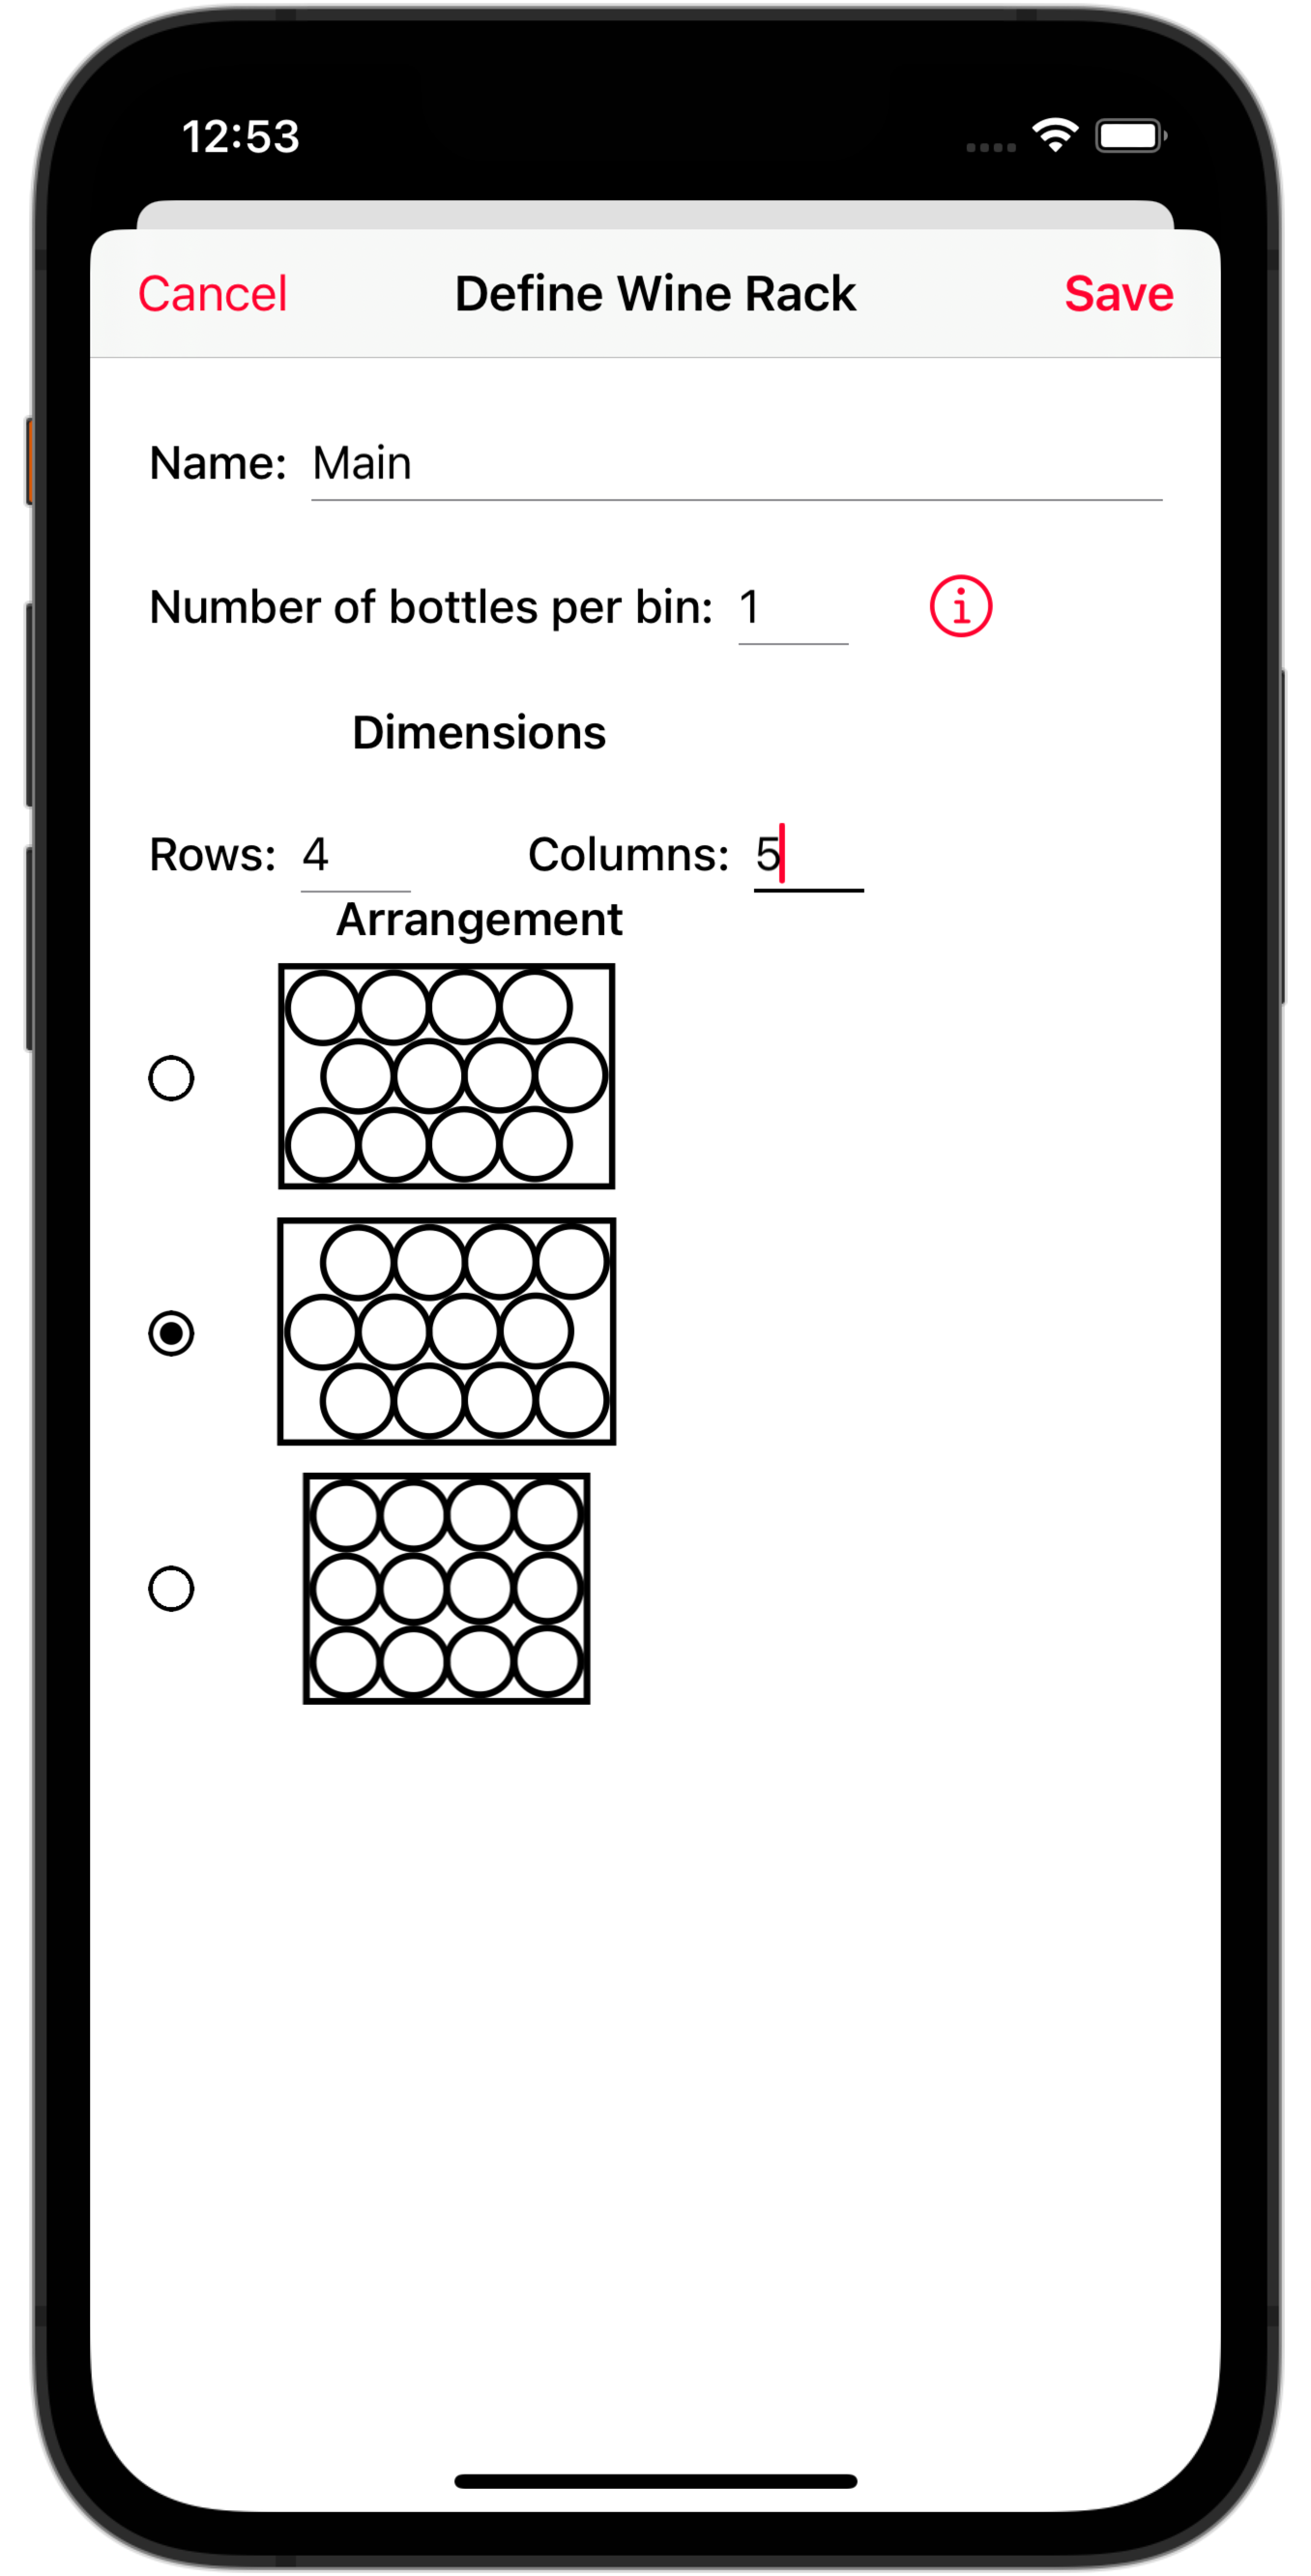
The first step is to define your (initial) wine rack.
|
|
Give the rack a name, specify the capacity of each bin (bins are compartments of a rack which contain bottles), and specify the geometry of rack. (Note that racks with one bottle per bin look different than racks with multiple bottles per bin.)
Tap Save.
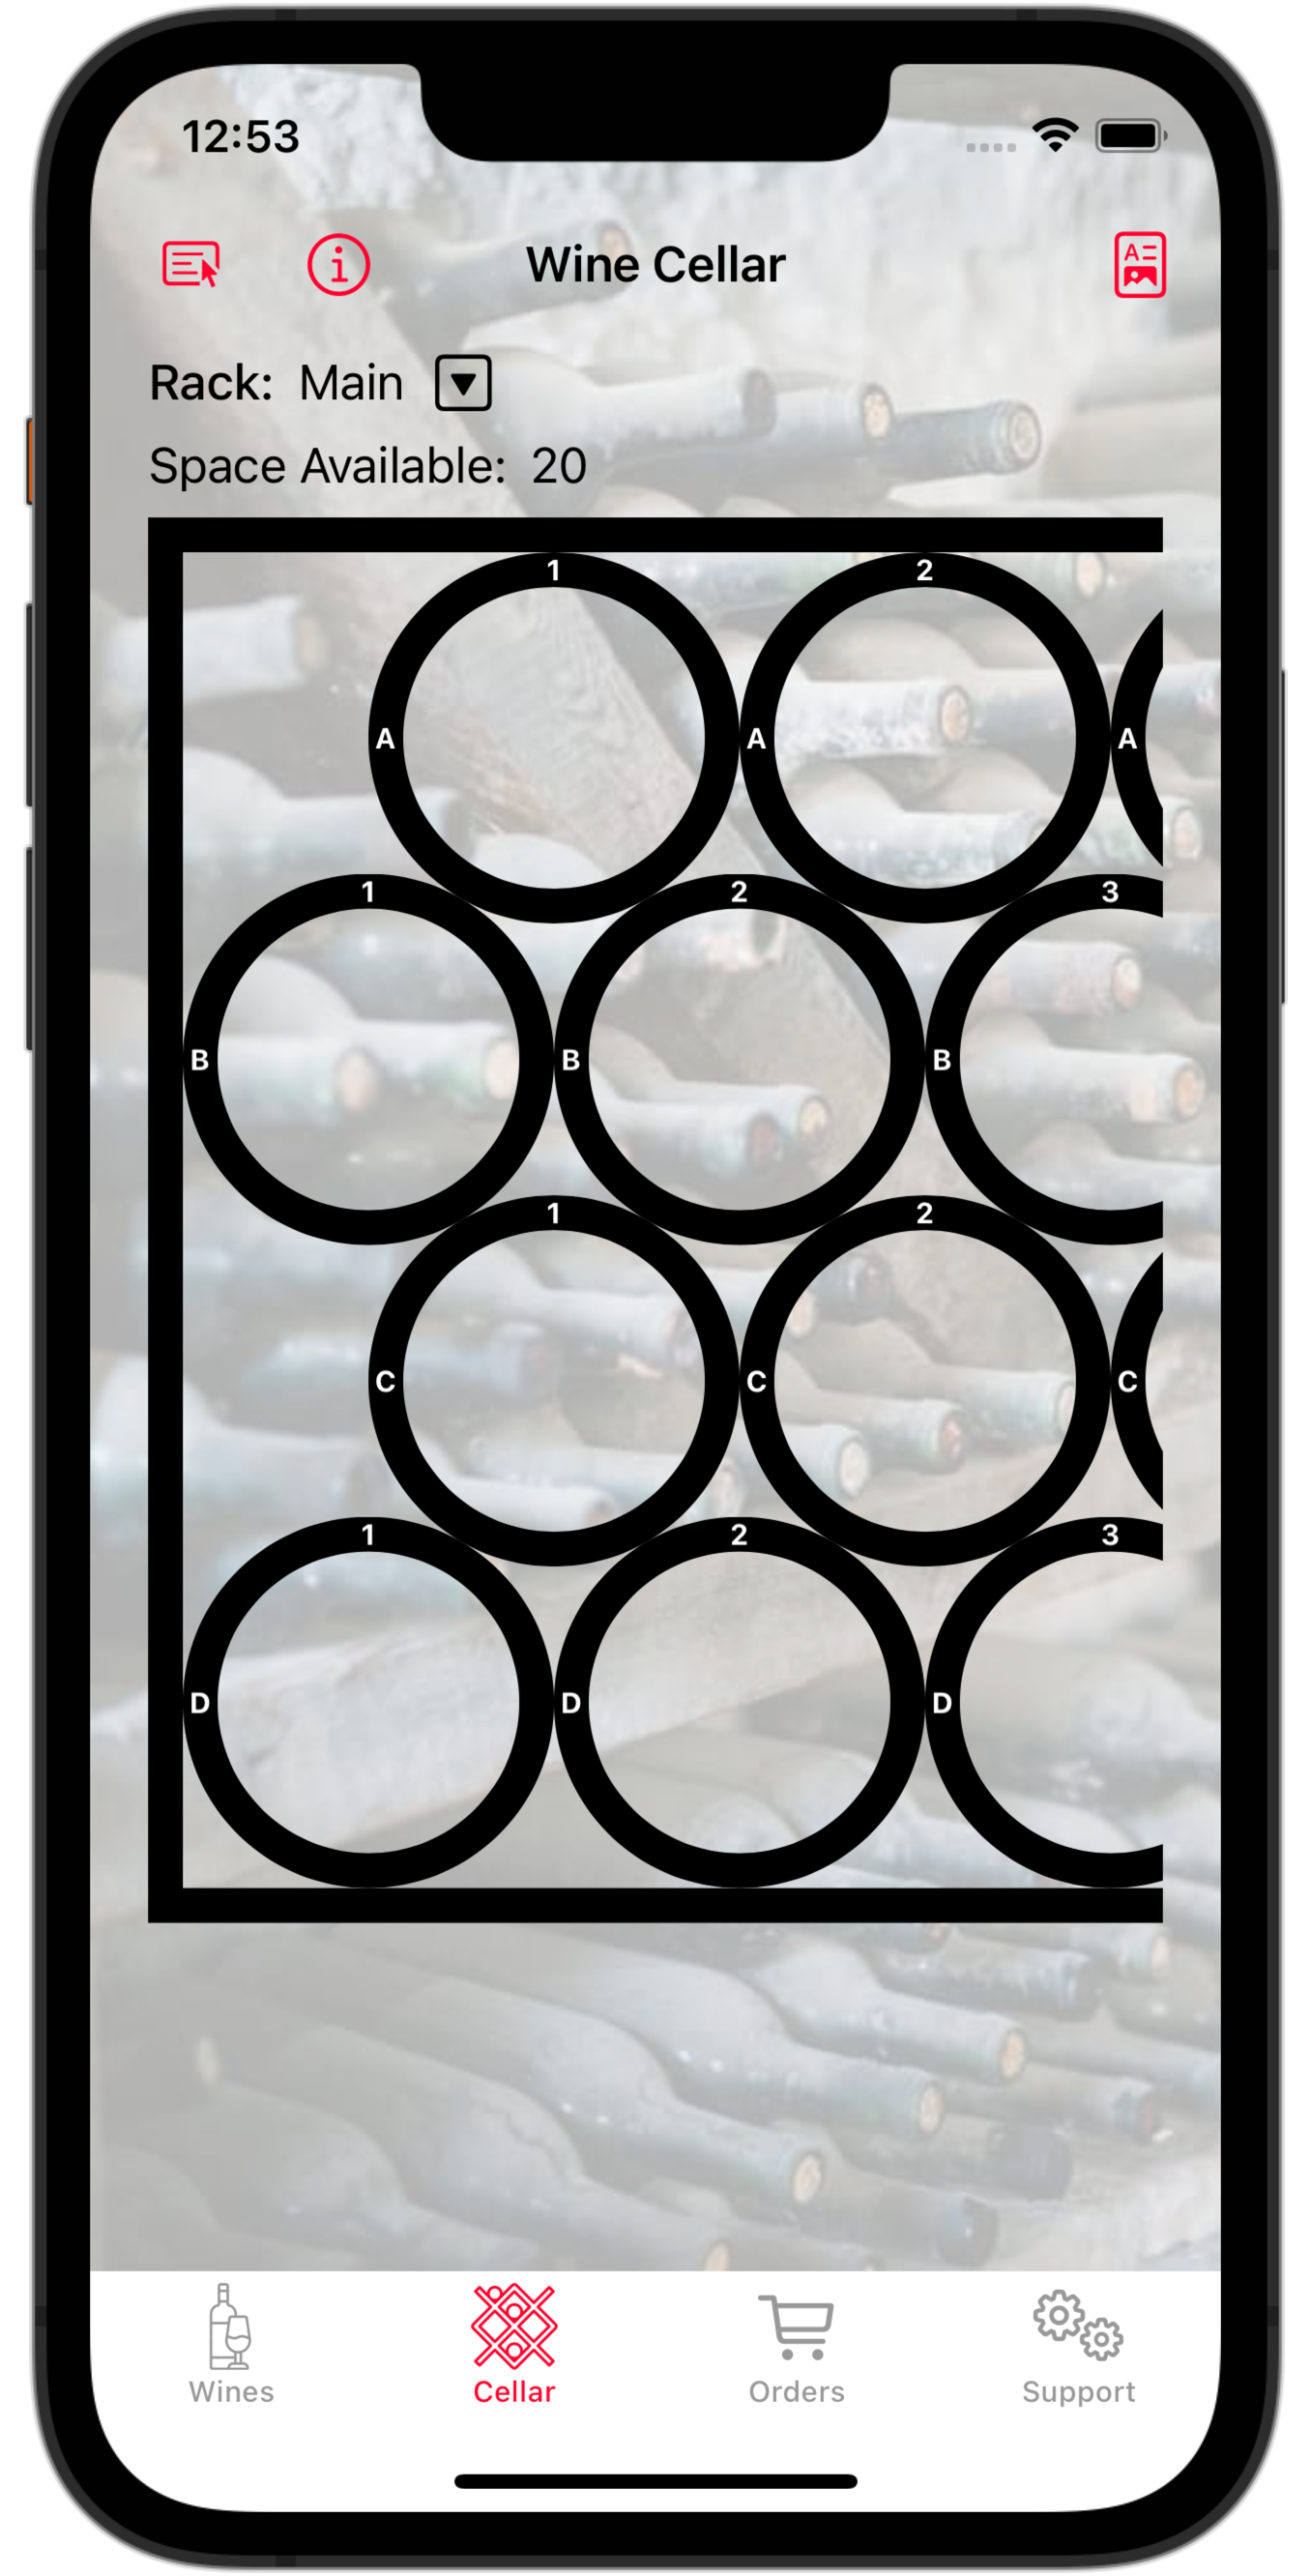
Notice that the row ("A", "B", "C") and column ("1", "2", …) values are indicated in each bin. For bins which can contain more than one bottle, the number of bottles in each bin is also indicated.
Adding Bottles
Let's assume that you have some bottles on hand. (For this example, we have two bottles of 2018 Domaine Does Granges Mâcon-Fuissé IGT on hand)
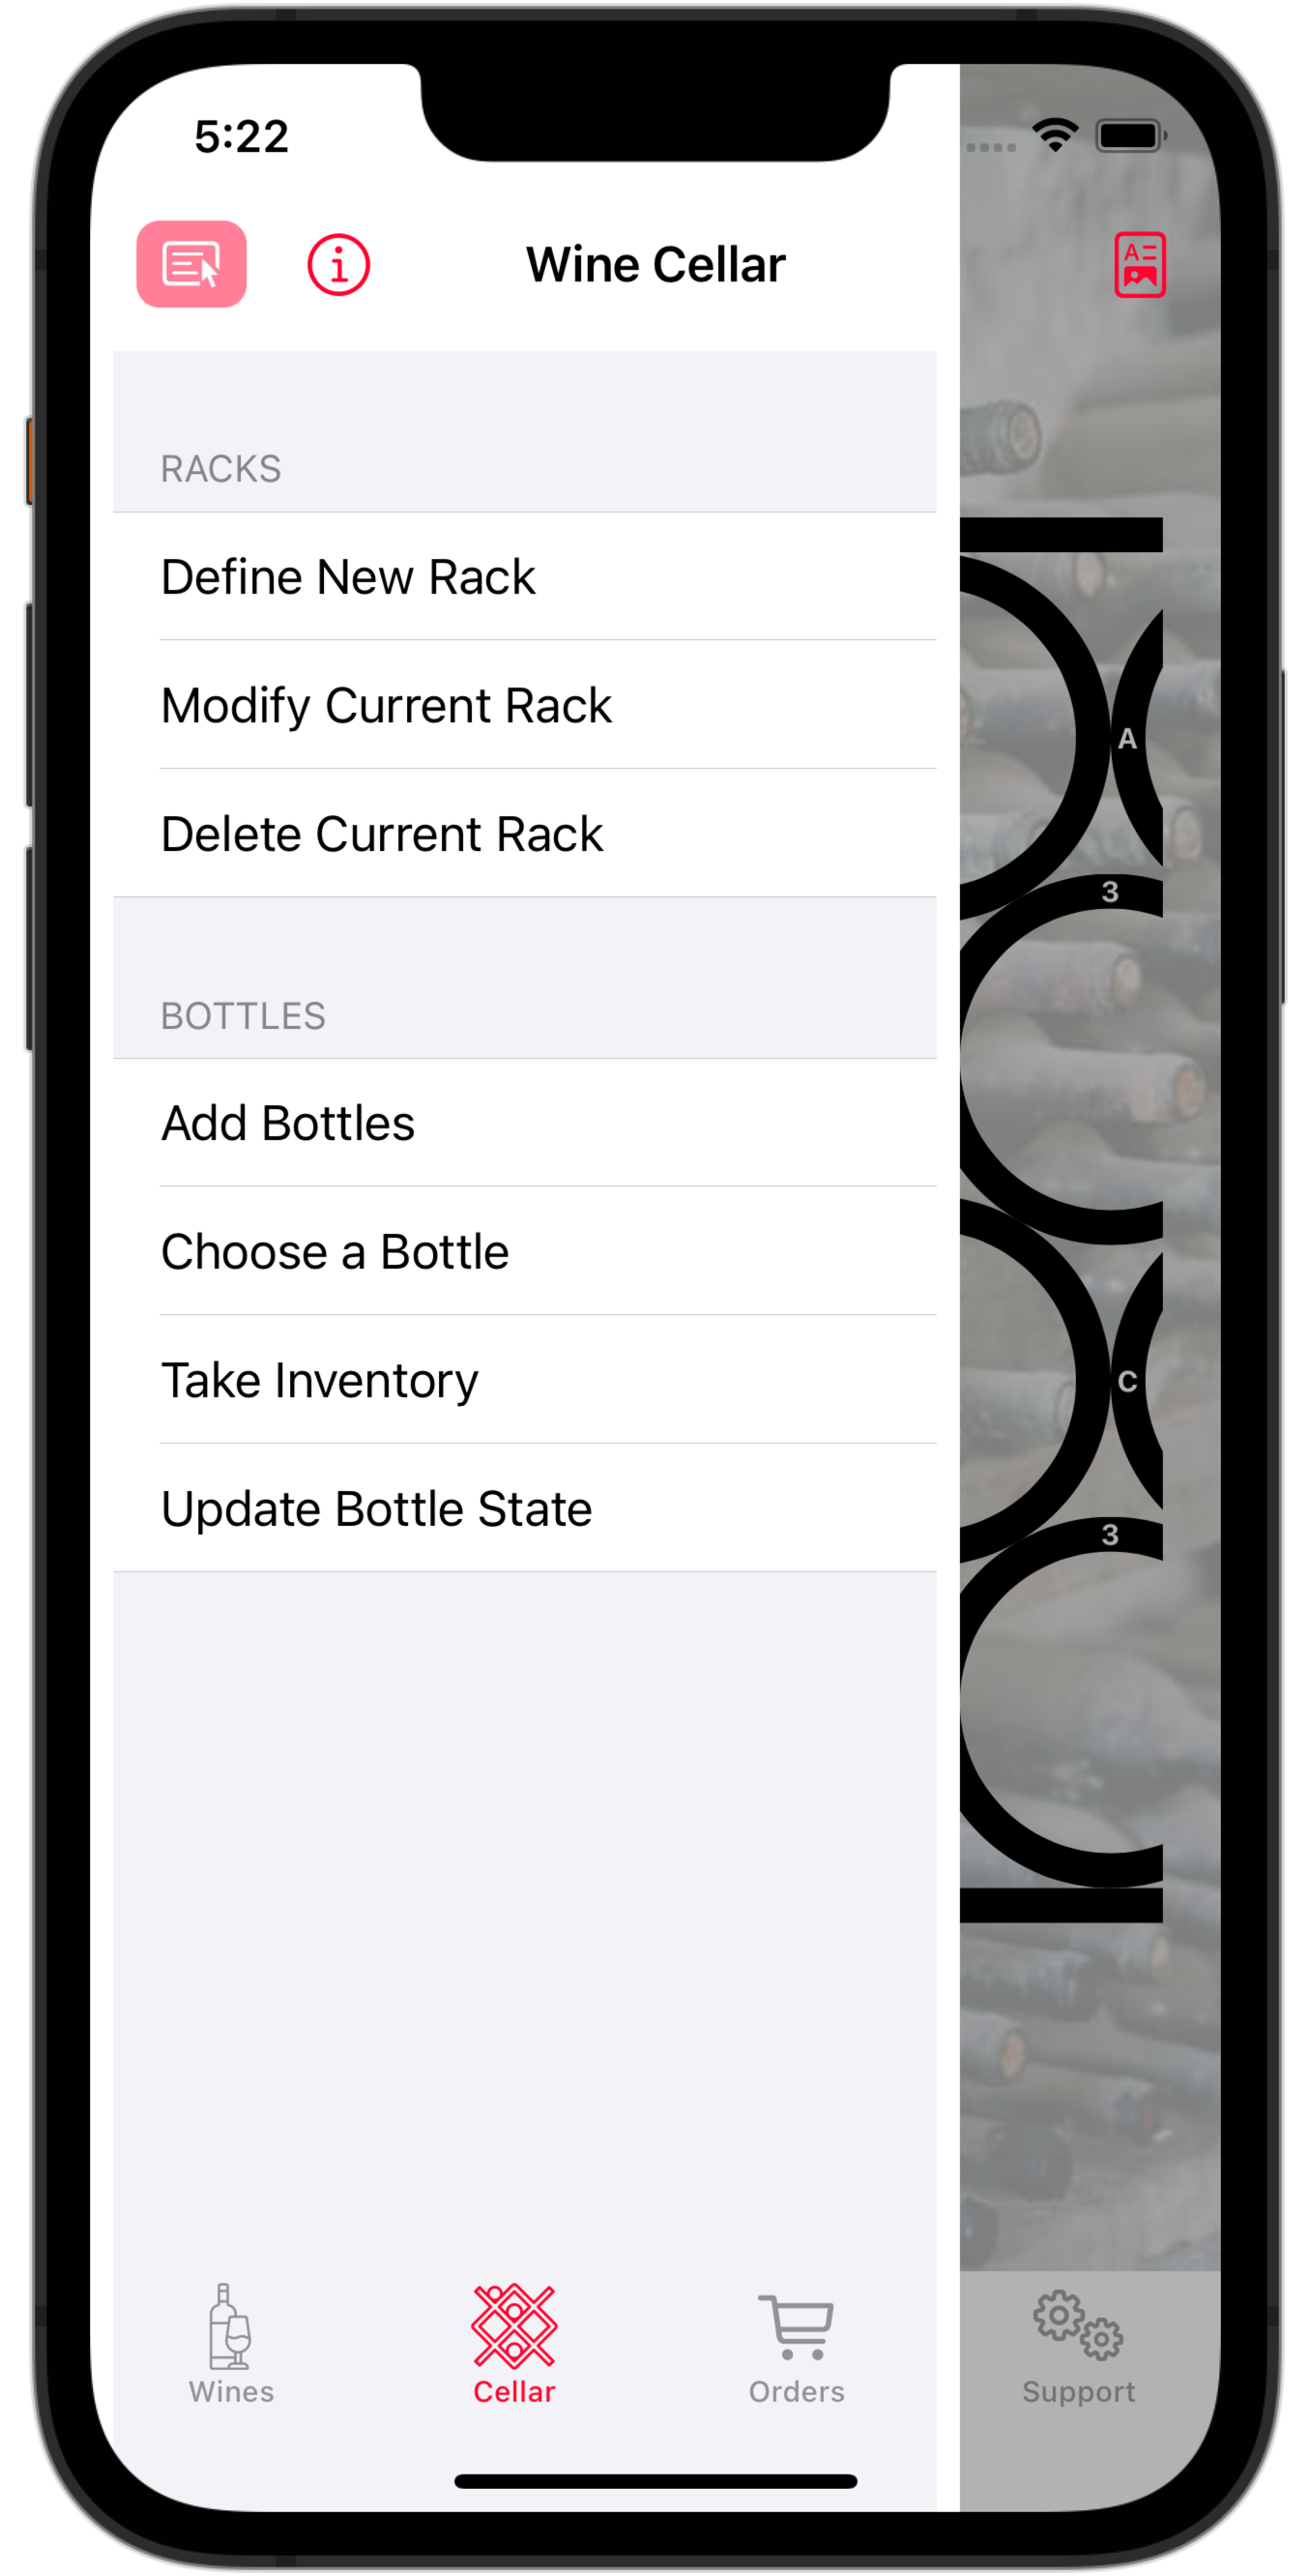
- Tap the Menu button (top-left of the screen).
- Tap Add Bottles.
- A new section appears on the screen just above the wine rack.
 |
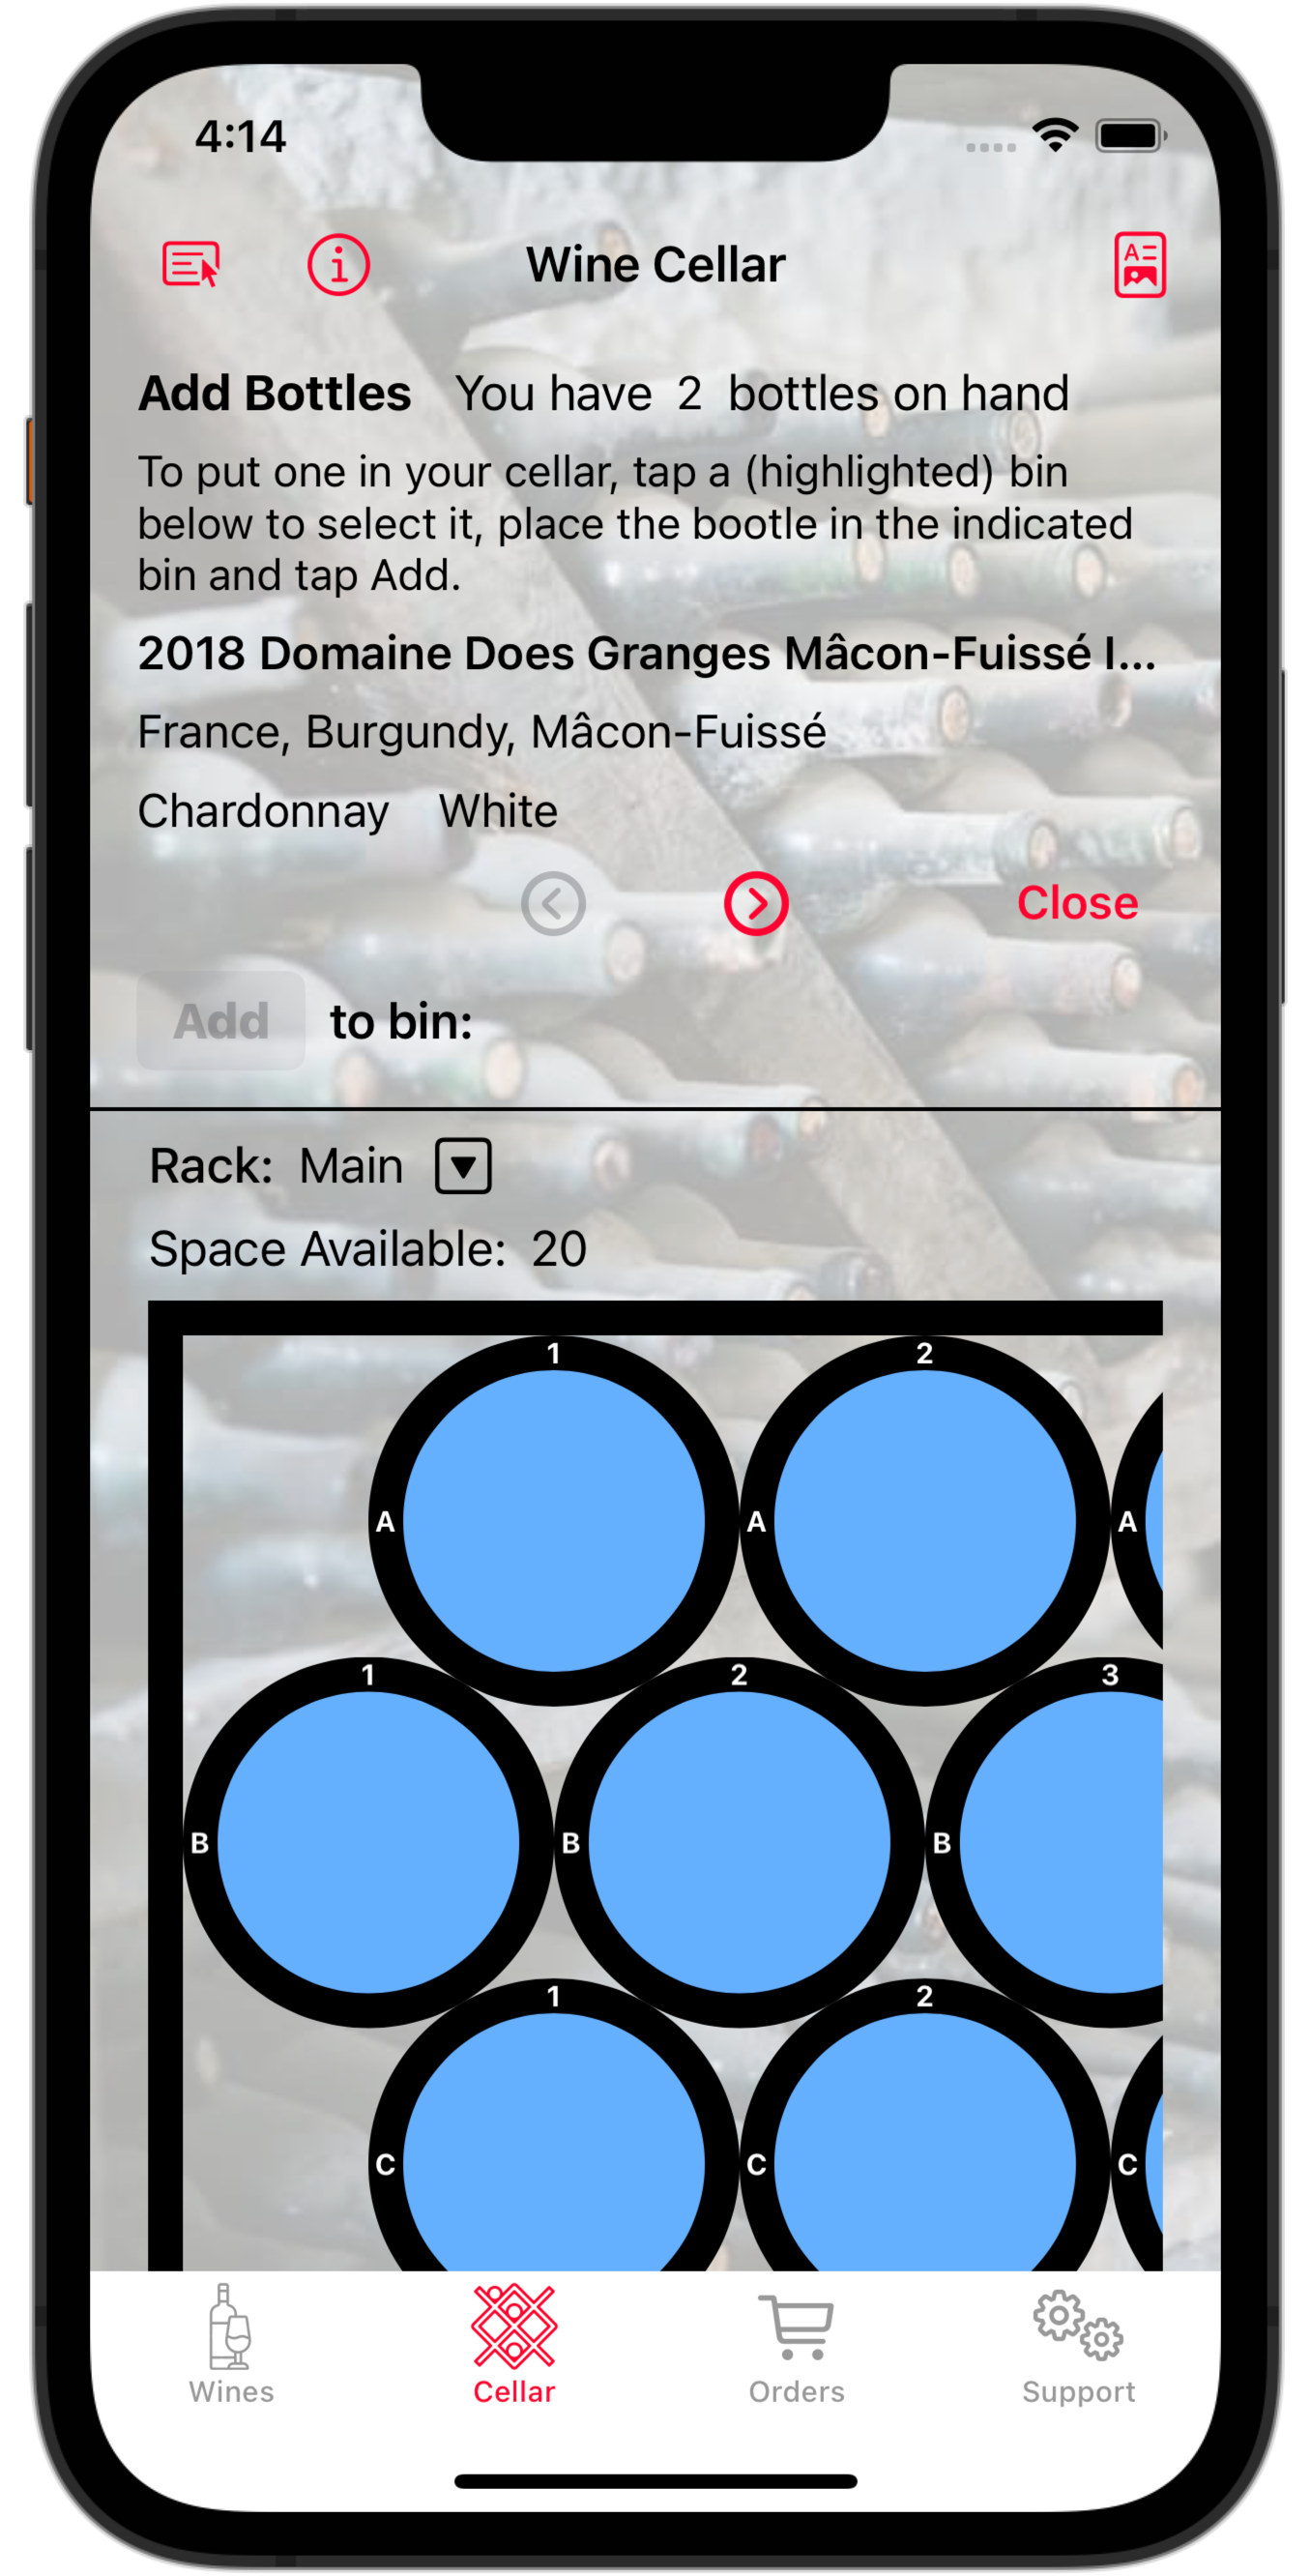 |
The blue-highlighted bins are available for the first bottle. (Since the rack was previously empty, all of the bins are blue-highlighted, meaning you could put the bottle anywhere.)
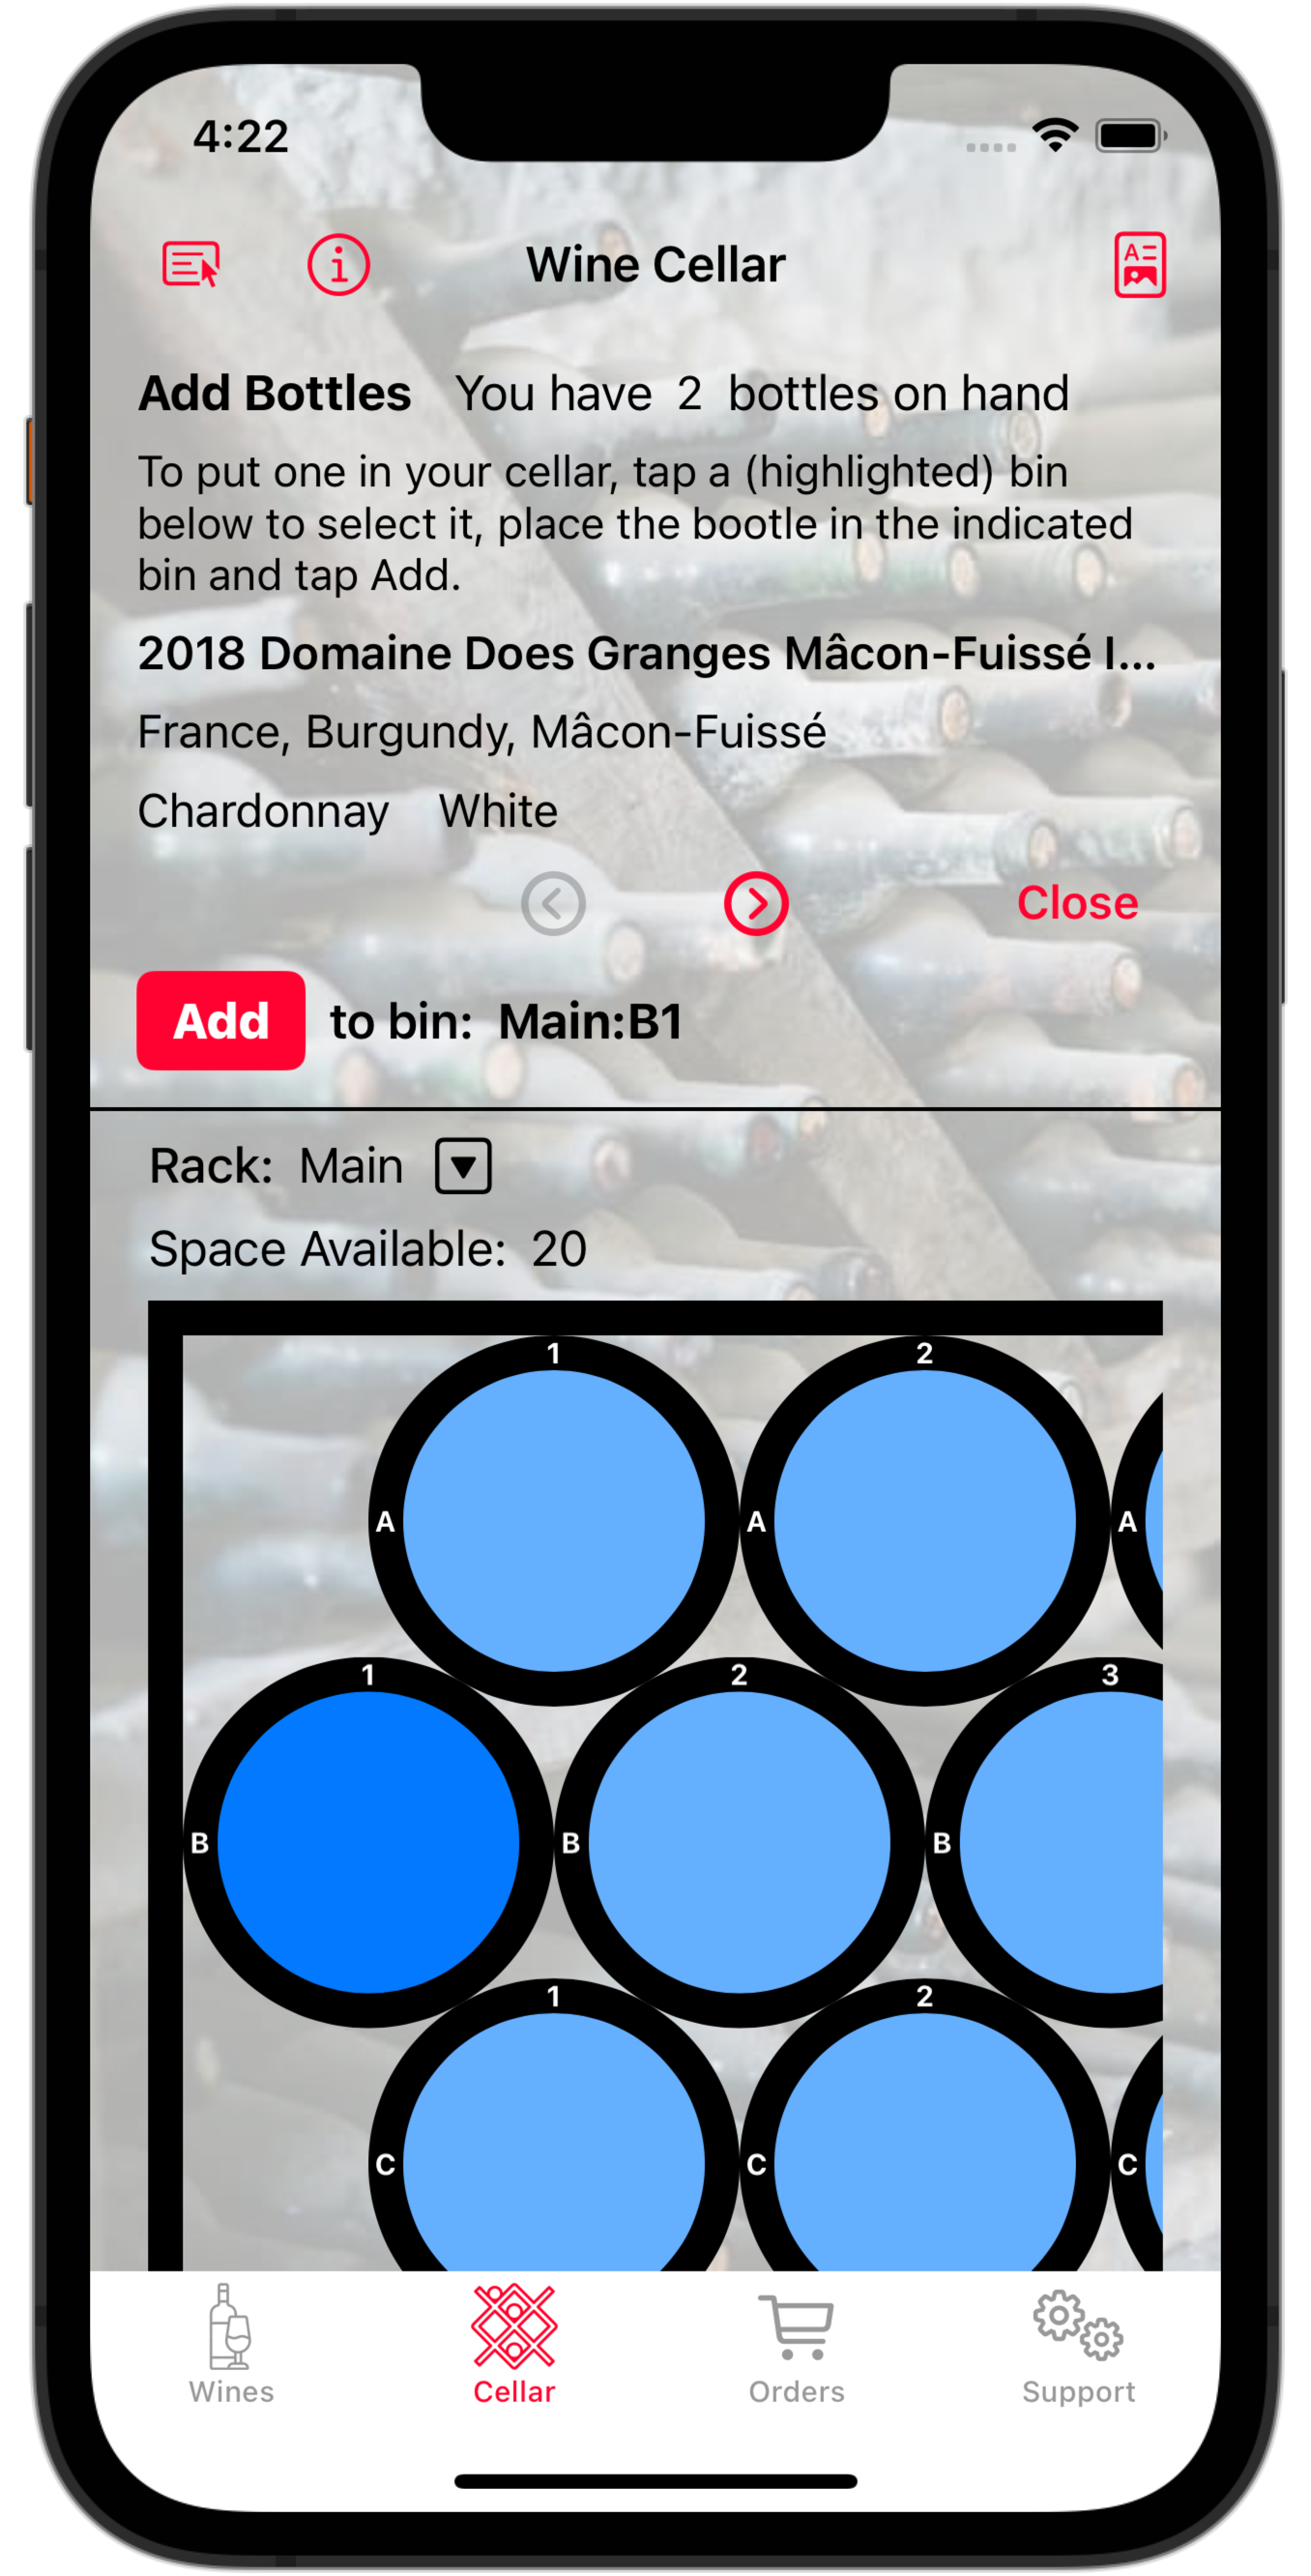
Let's put this bottle in bin B1 (second row, first column). To do so, just tap on the bin; it turns darker blue to indicate selection. Also, the Add button appears. To add the bottle, just tap it.
 |
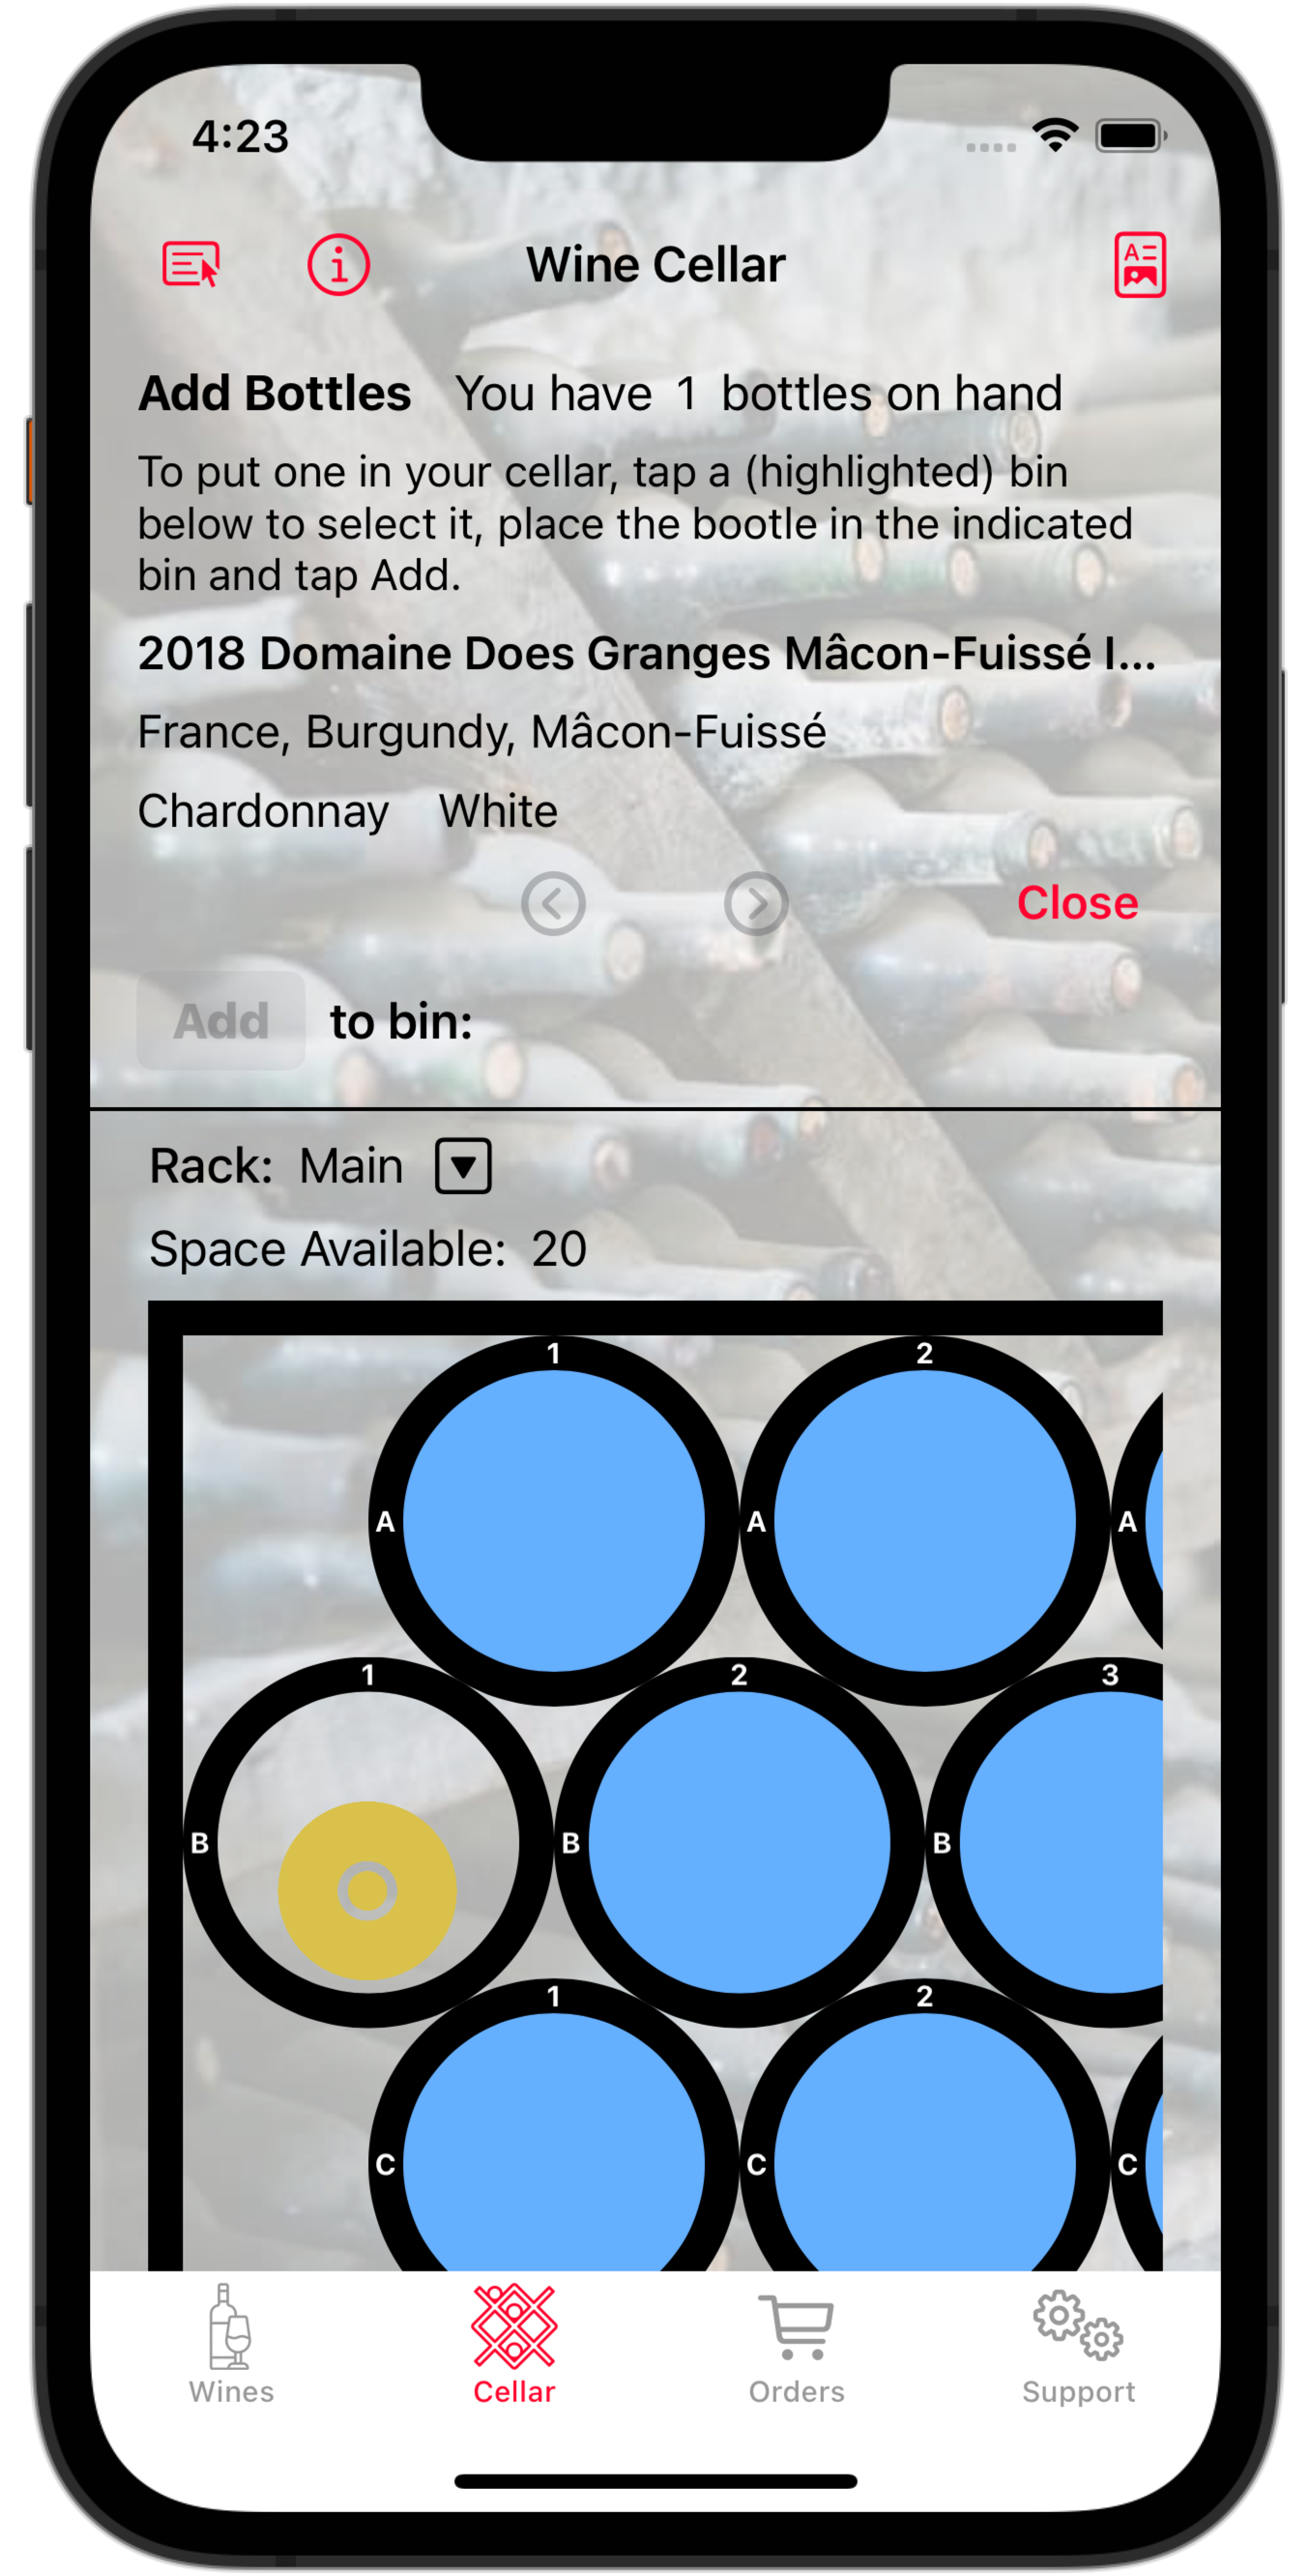 |
The bottle appears in bin B2. (Be sure to insert the actual bottle in your physical rack to match!)
Now repeat with the second bottle. Notice that you can't put it in B1 because than bin is already full. (That's because you specified earlier that for this rack, bins can only contain one bottle. If you had multi-bottle bins, things would be different.)
You can use the left and right arrows to move through the on-hand bottles. (You can pick and choose which bottles to add to your celler.) Tap Close when you're done adding bottles.
Finding Bottles
Wine Corner lets you see what's in your cellar and select a bottle to drink without going downstairs and squinting at the bins:
- You can browse your cellar
- You can choose a bottle by searching
- You can create a Rack Contents report or a Bottle Location report. A Rack Contents report lists every non-empty bin and it's contents. A Bottle Location report lists every wine in your cellar and the bin or bins that contain it.
Browsing
It you tap a non-empty bin in your cellar, a pop-up will appear displaying it's contents.
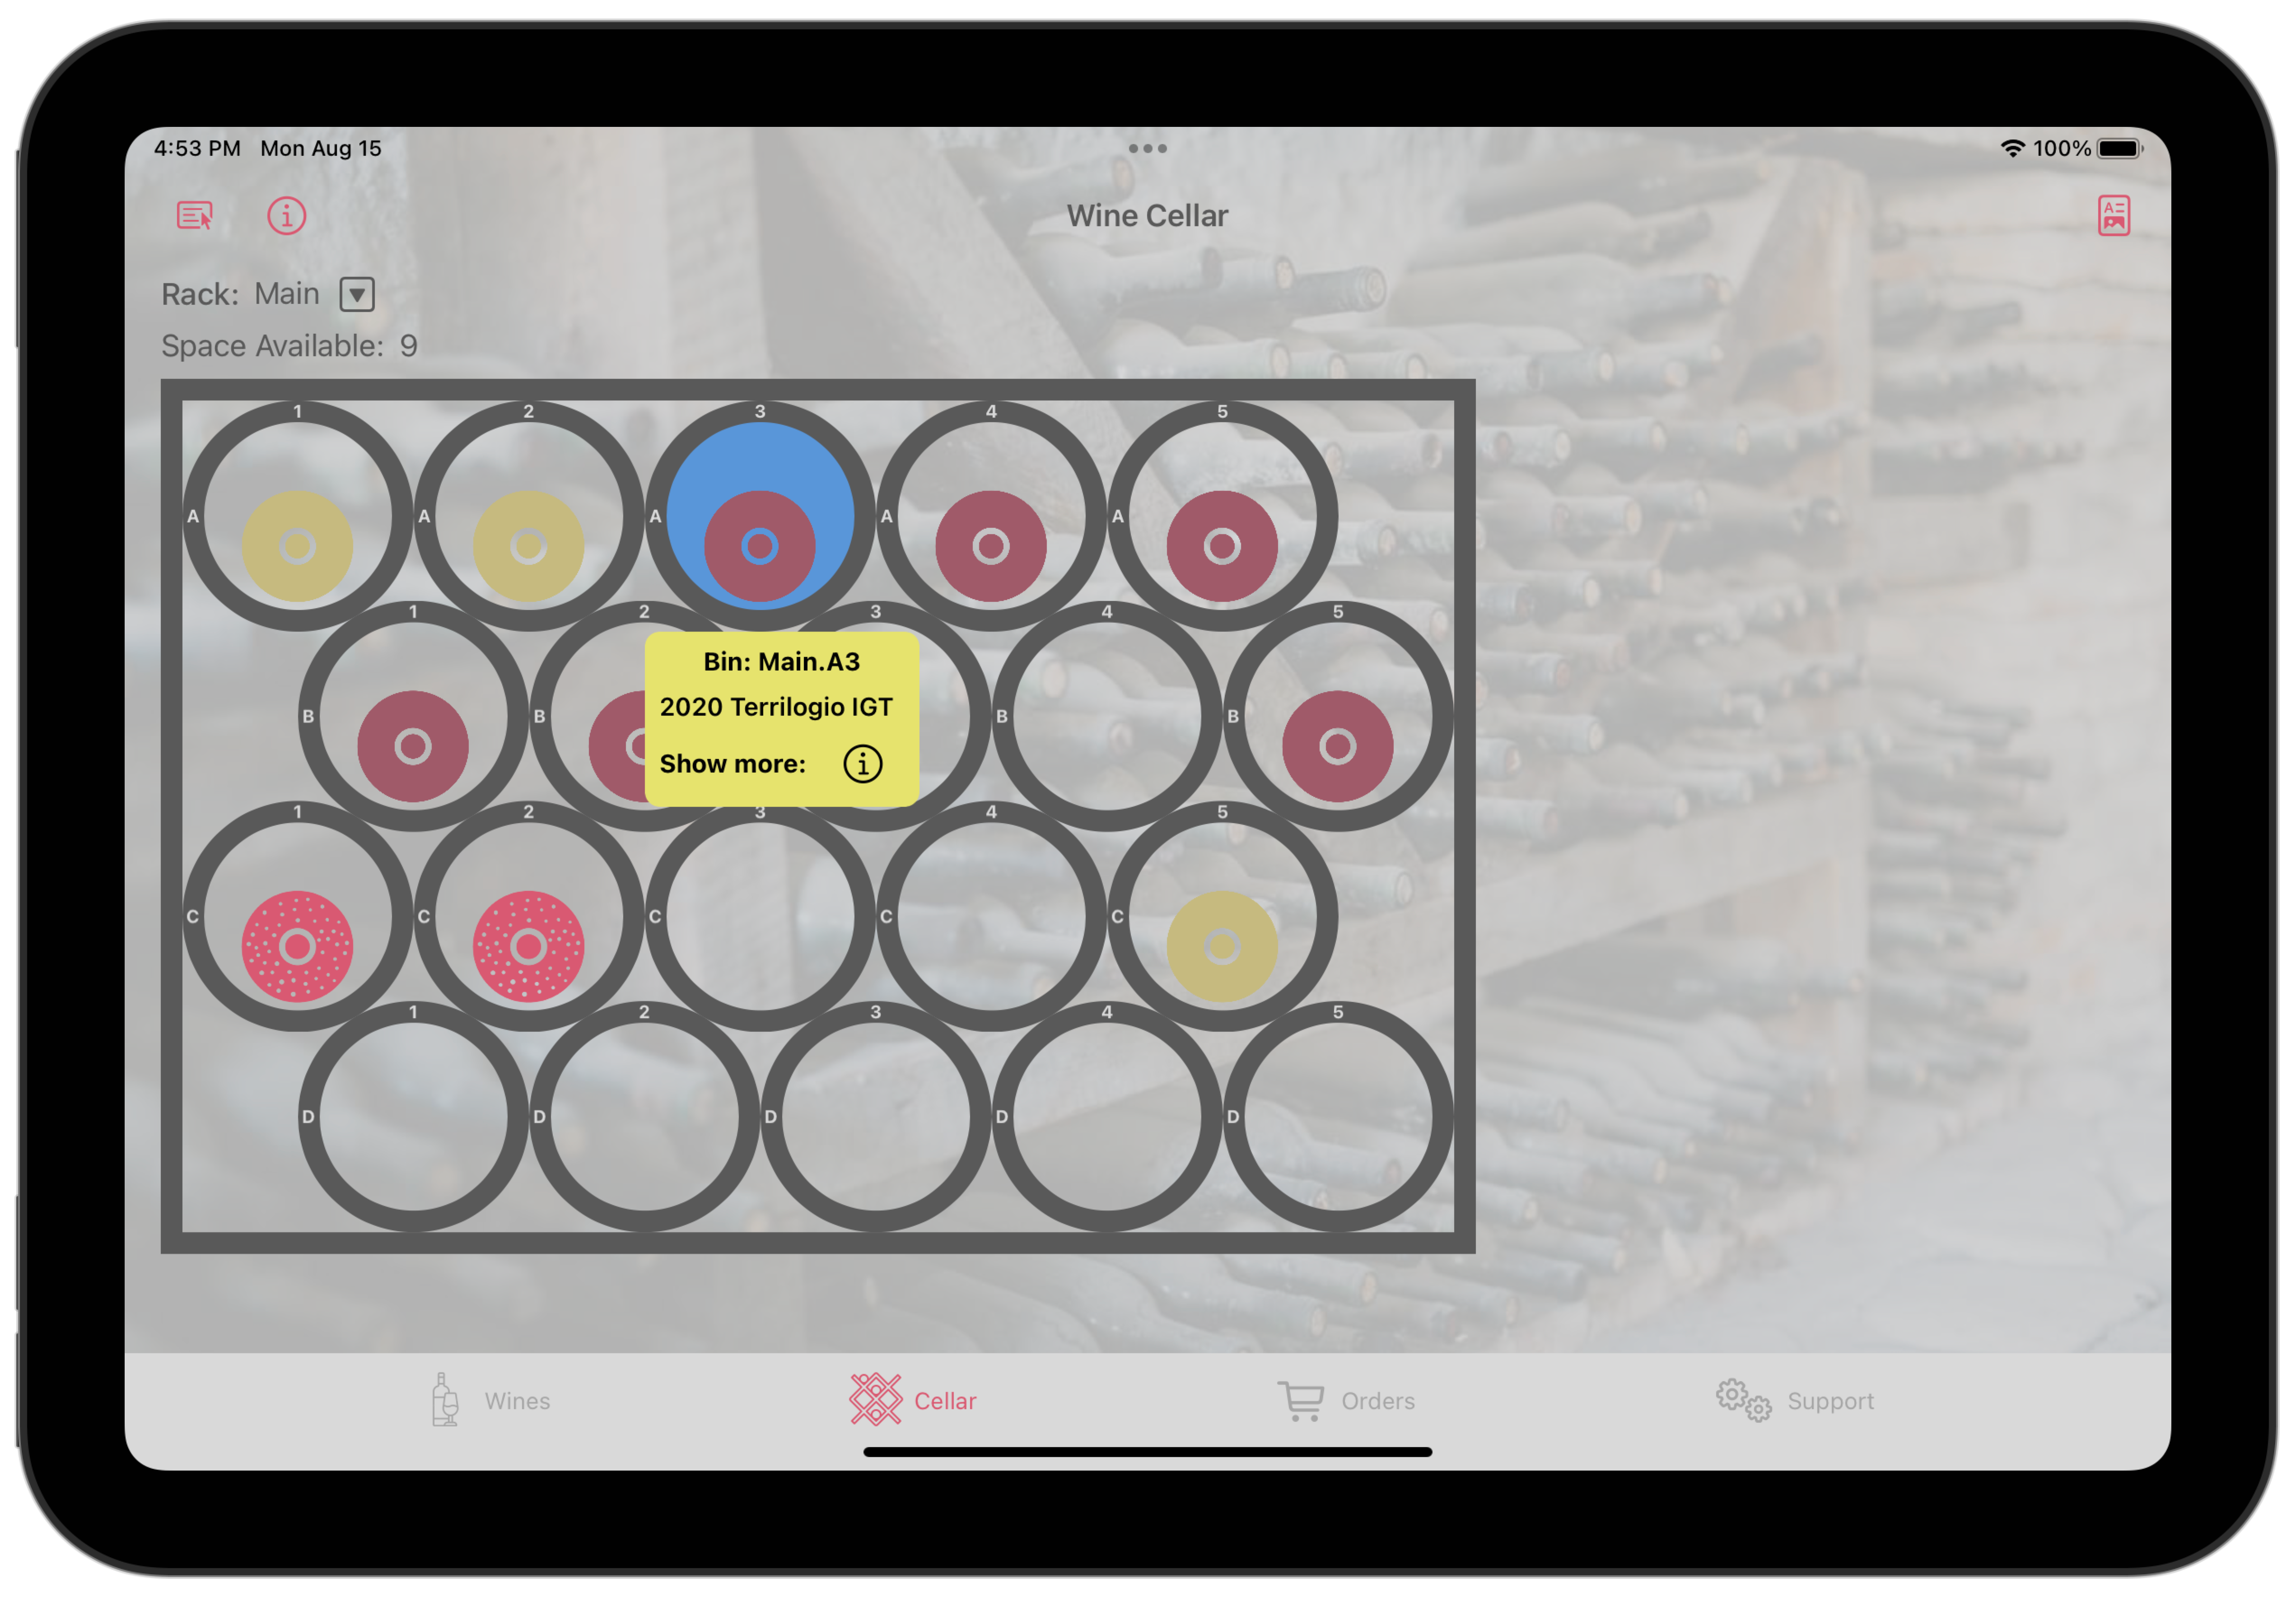
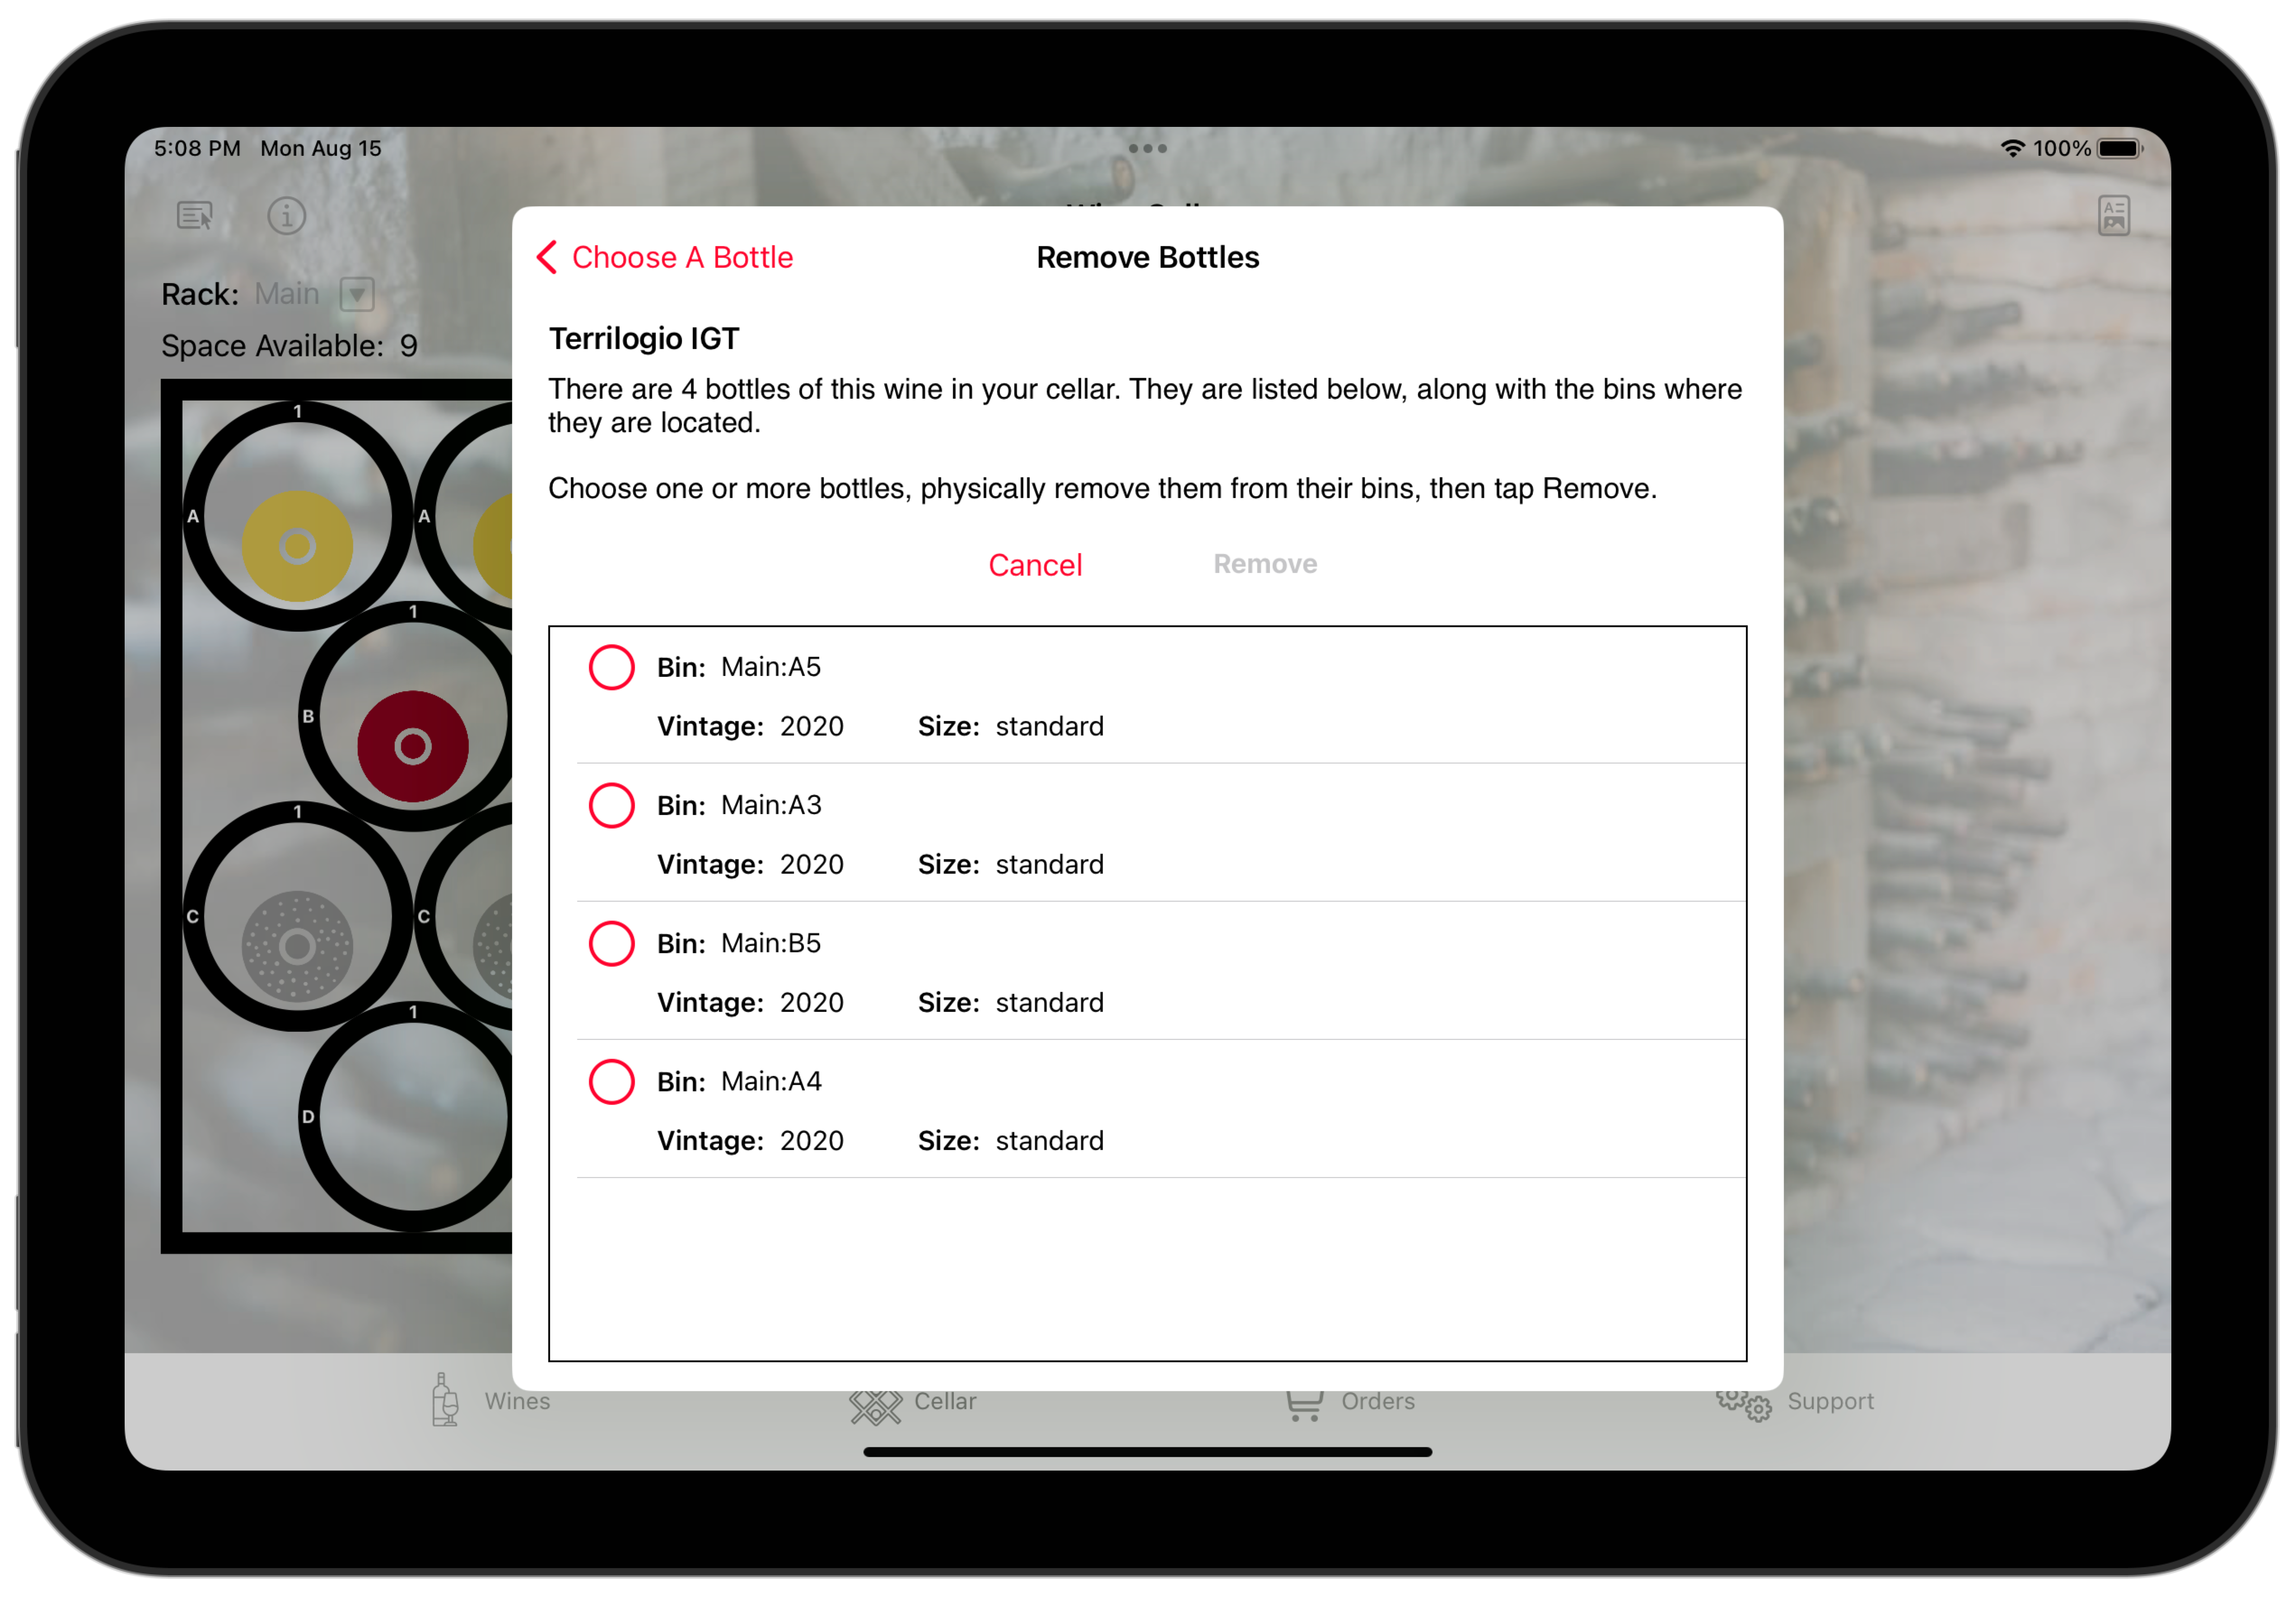
Tap the information ( i ) button on that pop-up to display more information, and possibly remove bottle(s) from the bin.
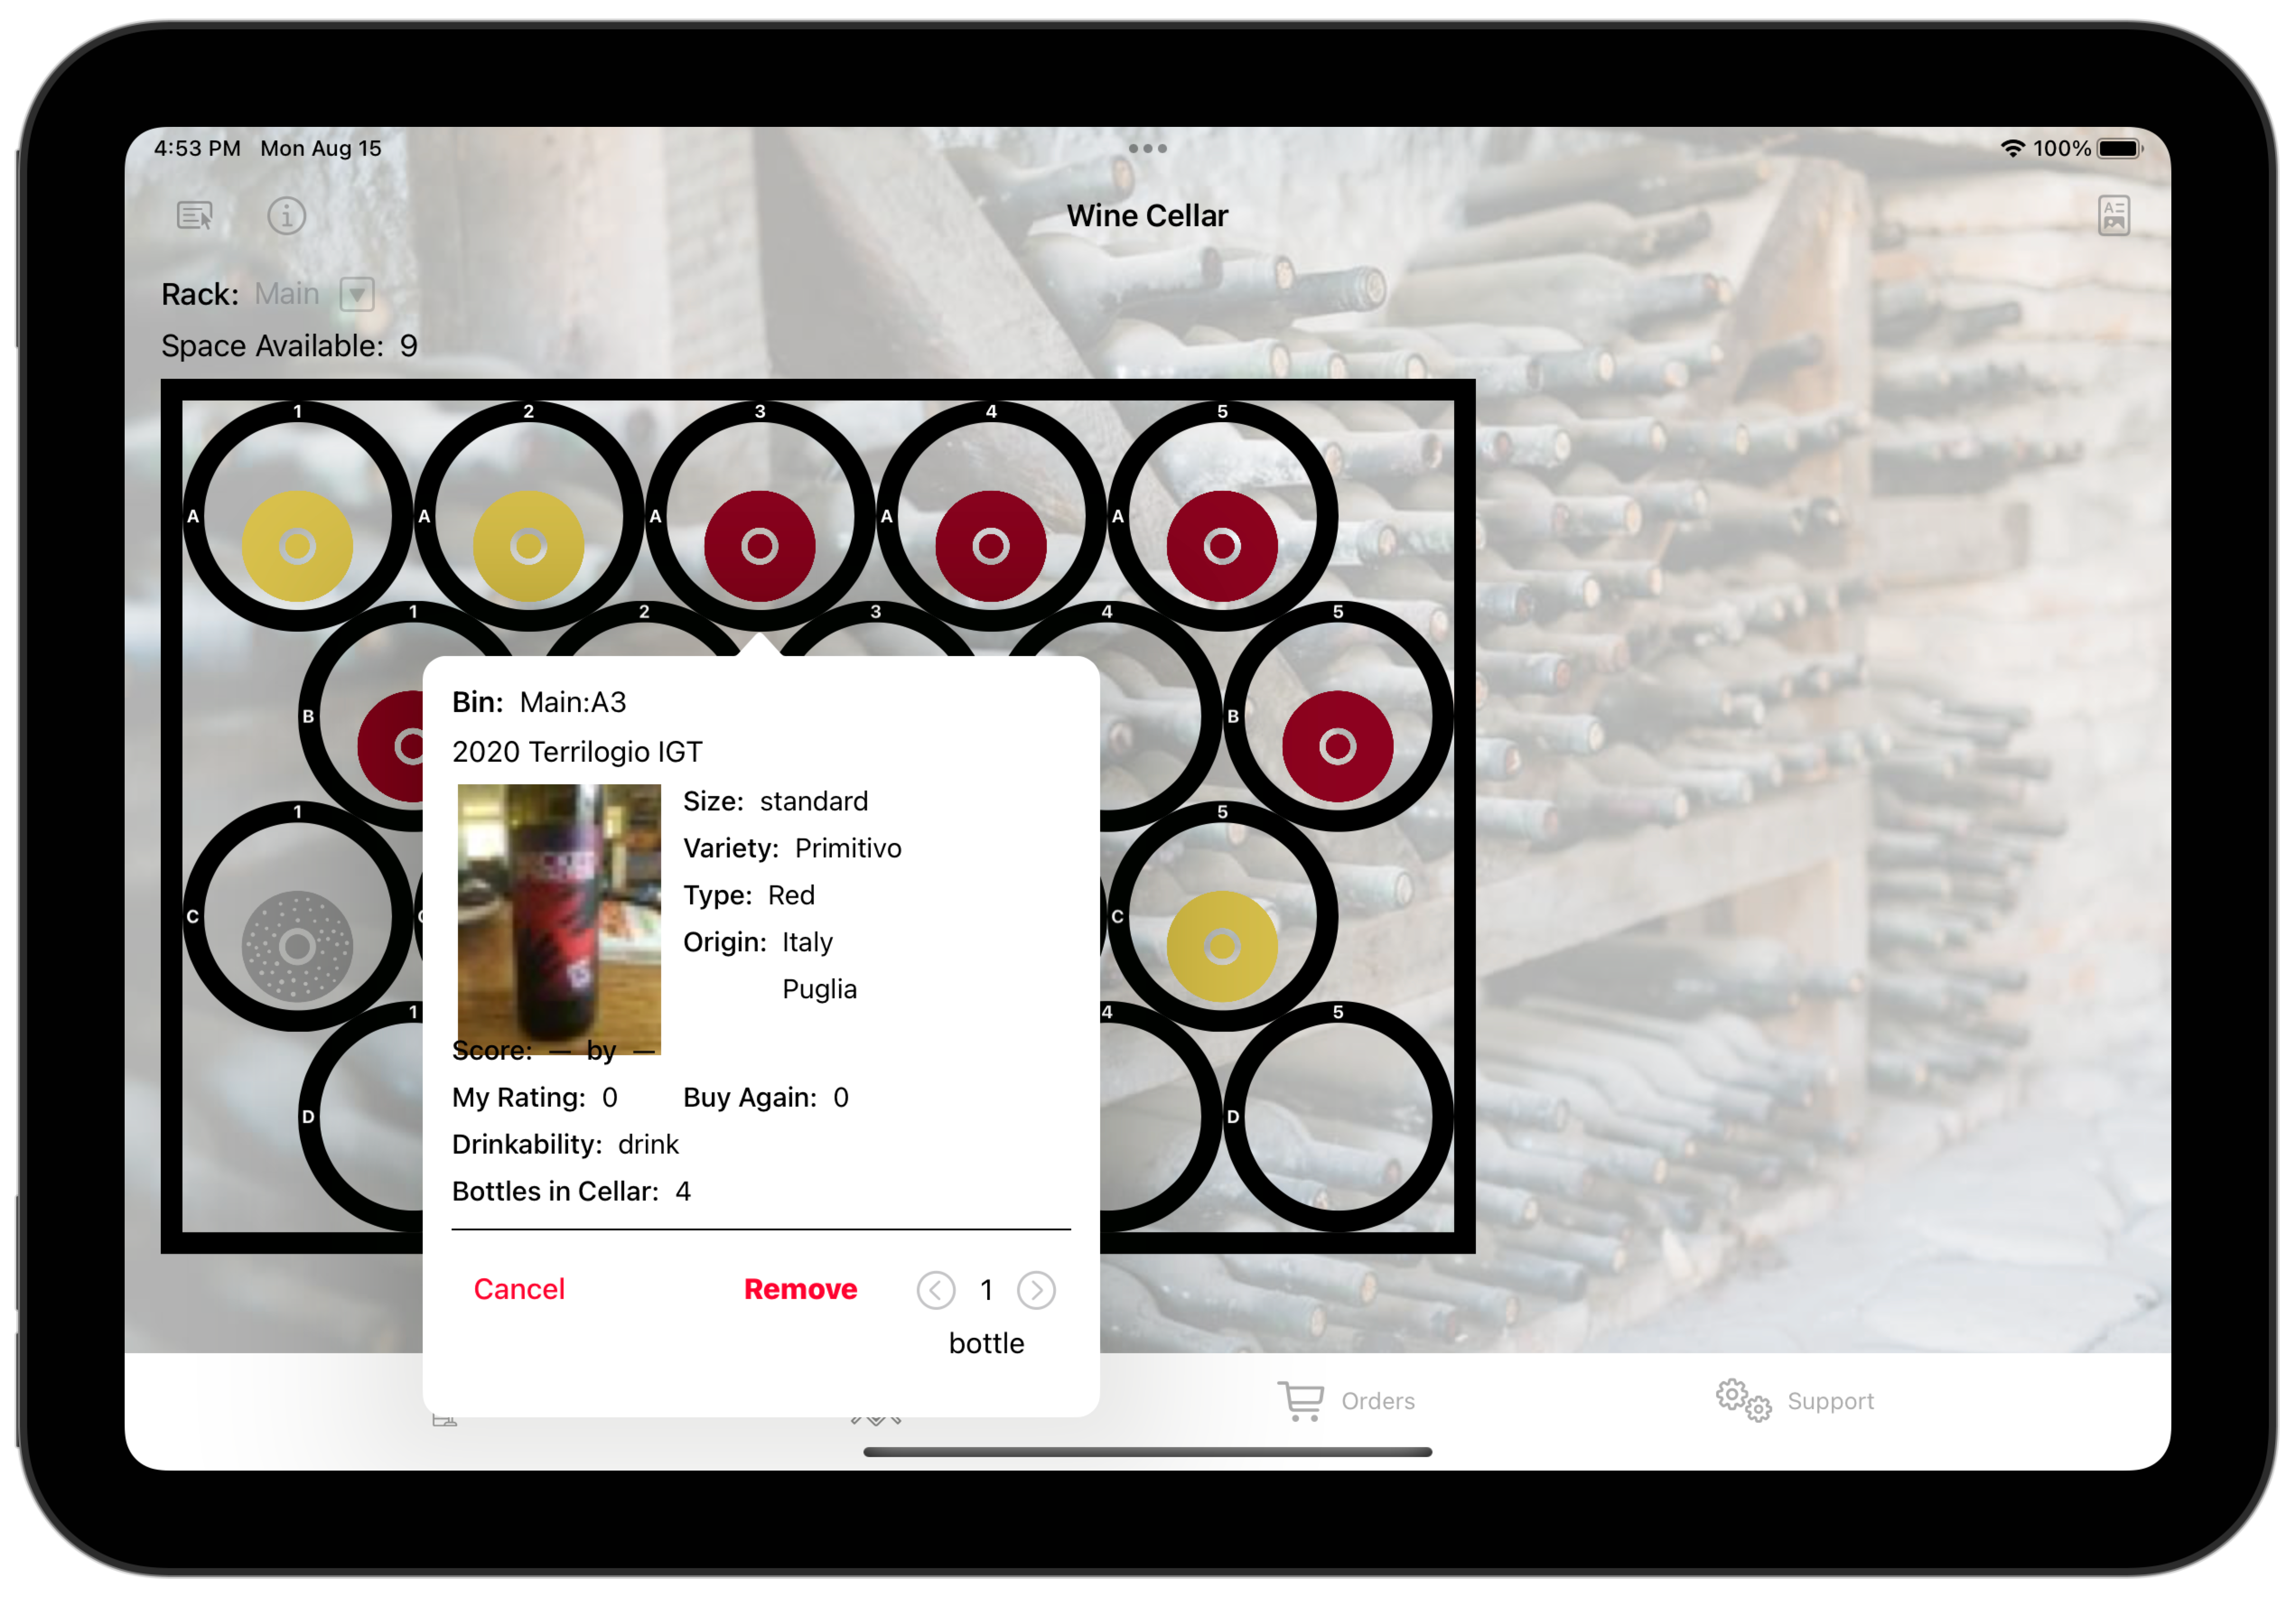
Tap Remove to remove the bottle from the rack. (And physically remove it!)
Choosing a Bottle
Browsing your cellar is not the best (or most efficient) way to find a particular bottle of wine. You can do better.
- Tap the Menu button (top-left of the screen).
- Tap Choose a Bottle.
- This dialog appears.
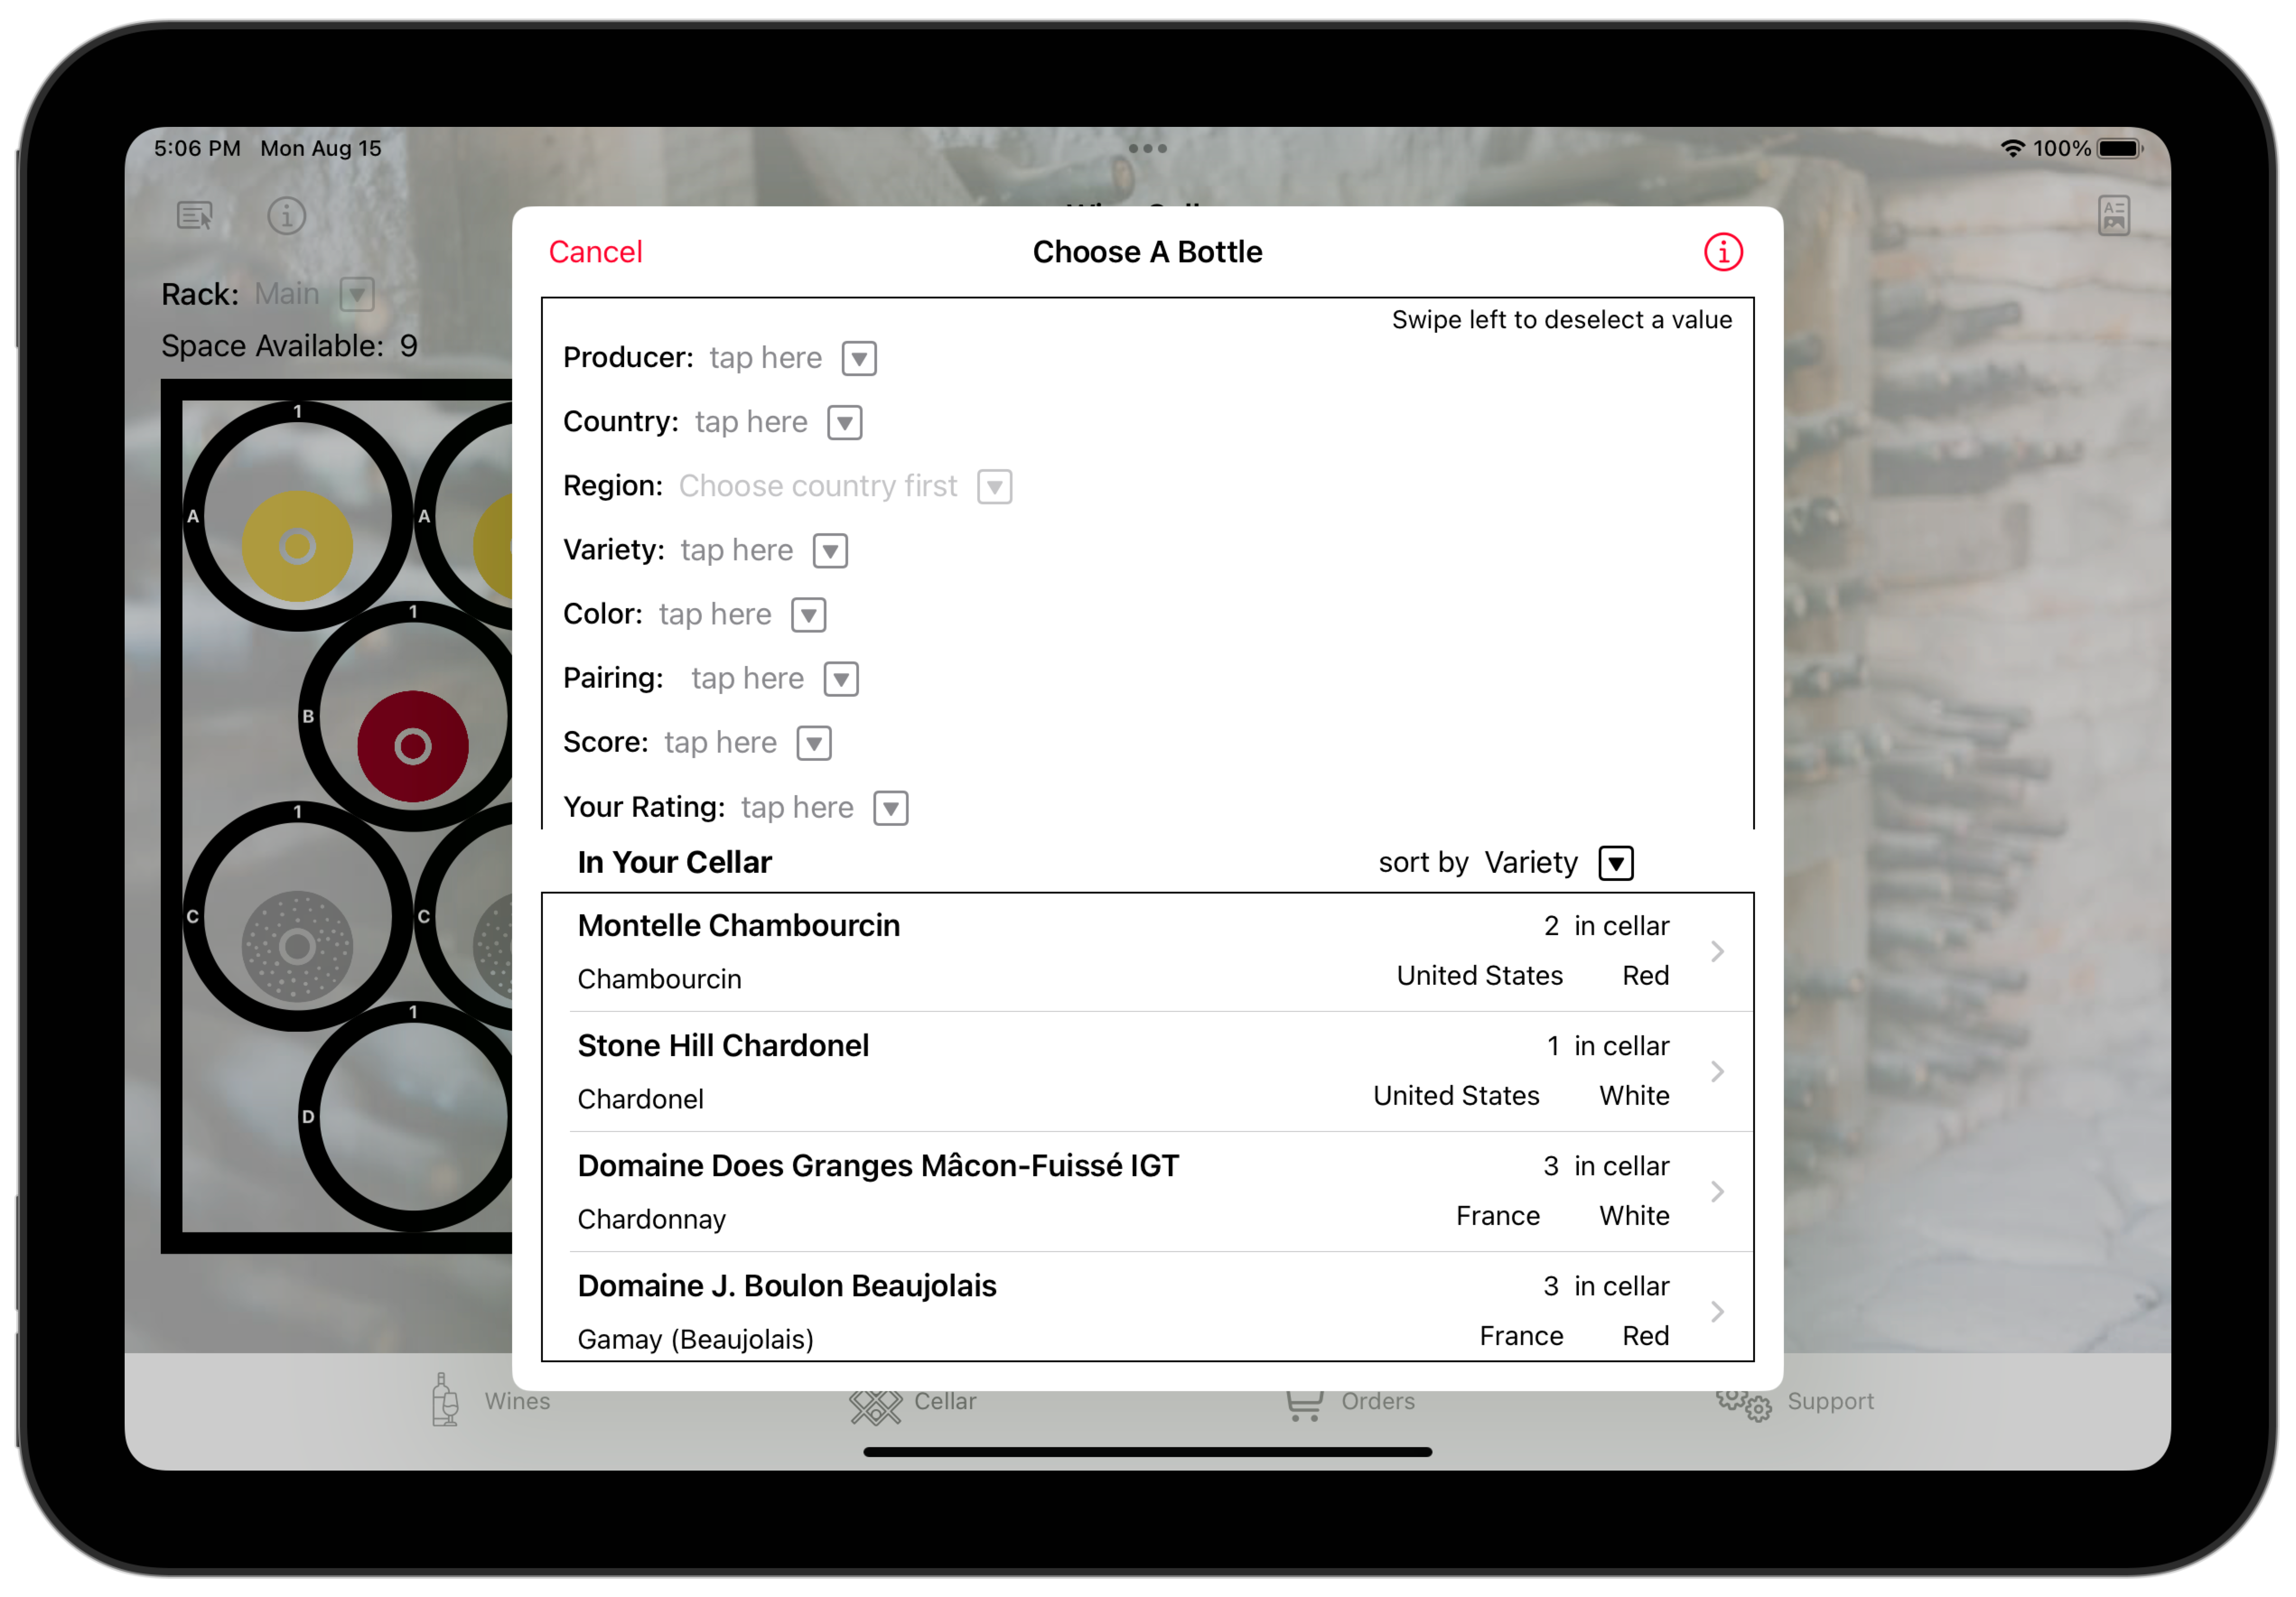
This dialog has two sections (top and bottom). The top section contains selection criteria. The bottom section shows the bottles in your cellar that meet the current selection criteria. With no criteria specified, all wines are listed.
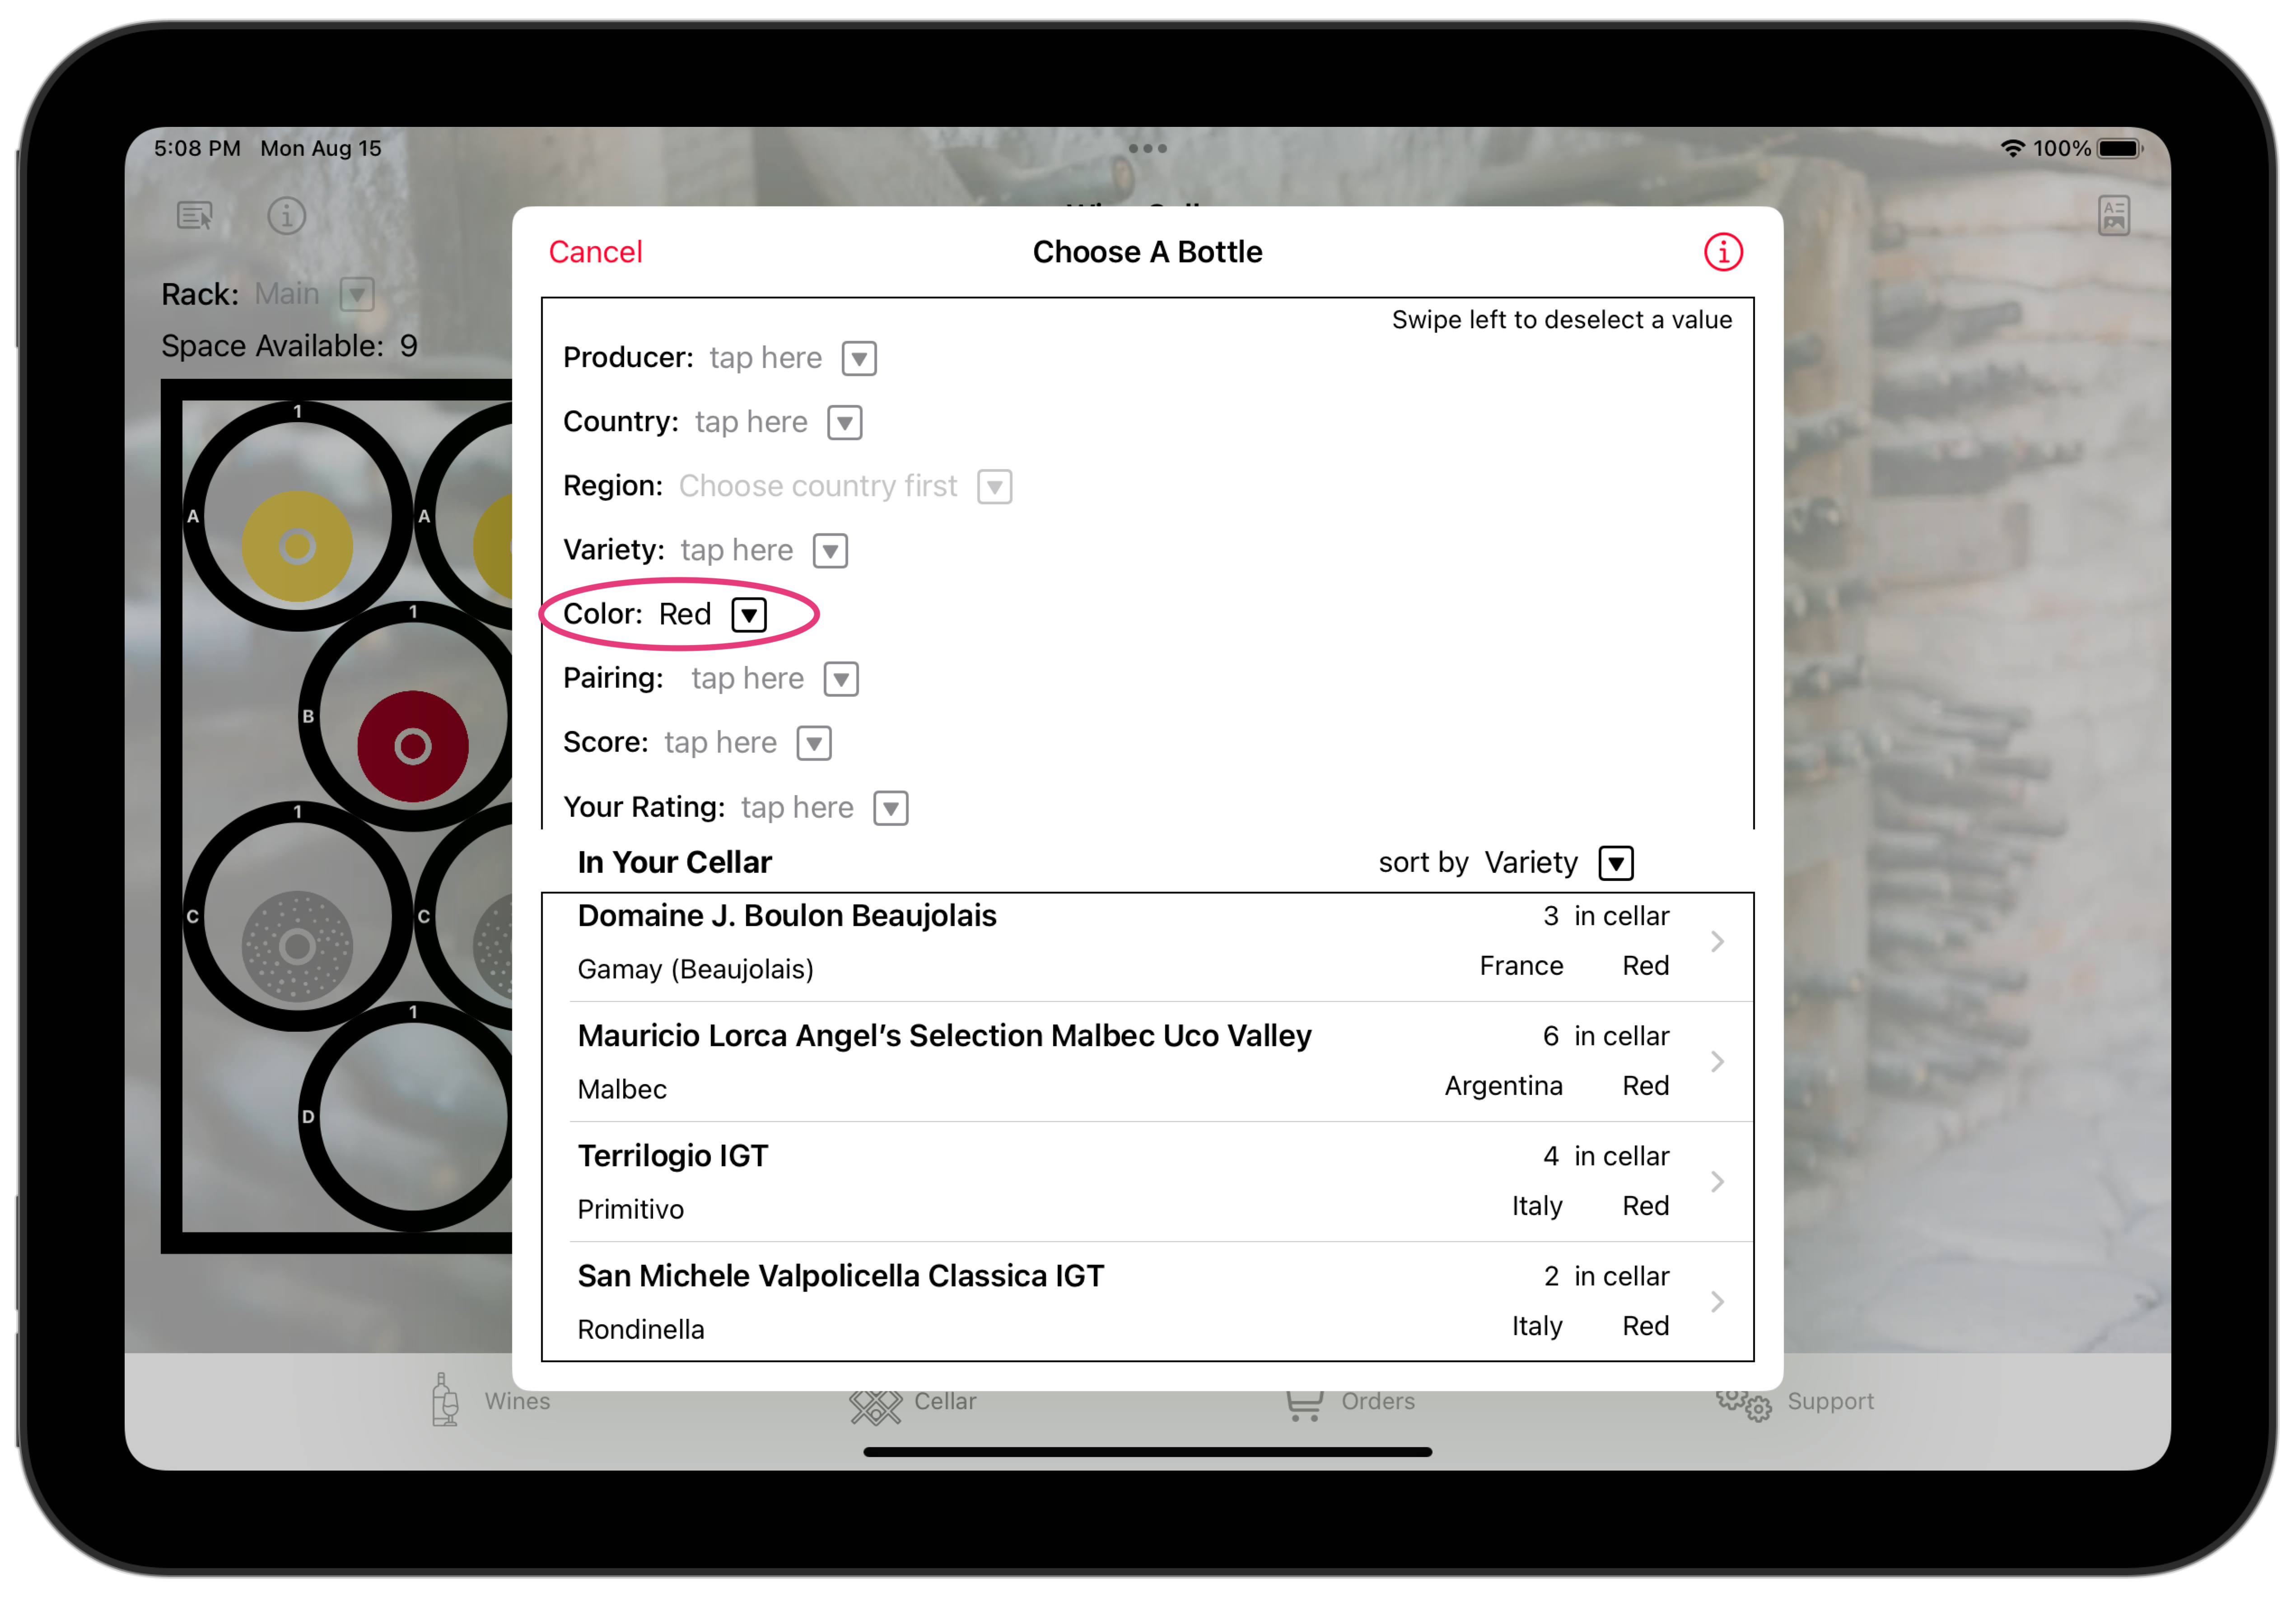
Let's say we're looking for an Italian red. We start with color. Note how selecting "red" changes the list of available wines.
Now we select Italy as the country of origin, and the list narrows further.
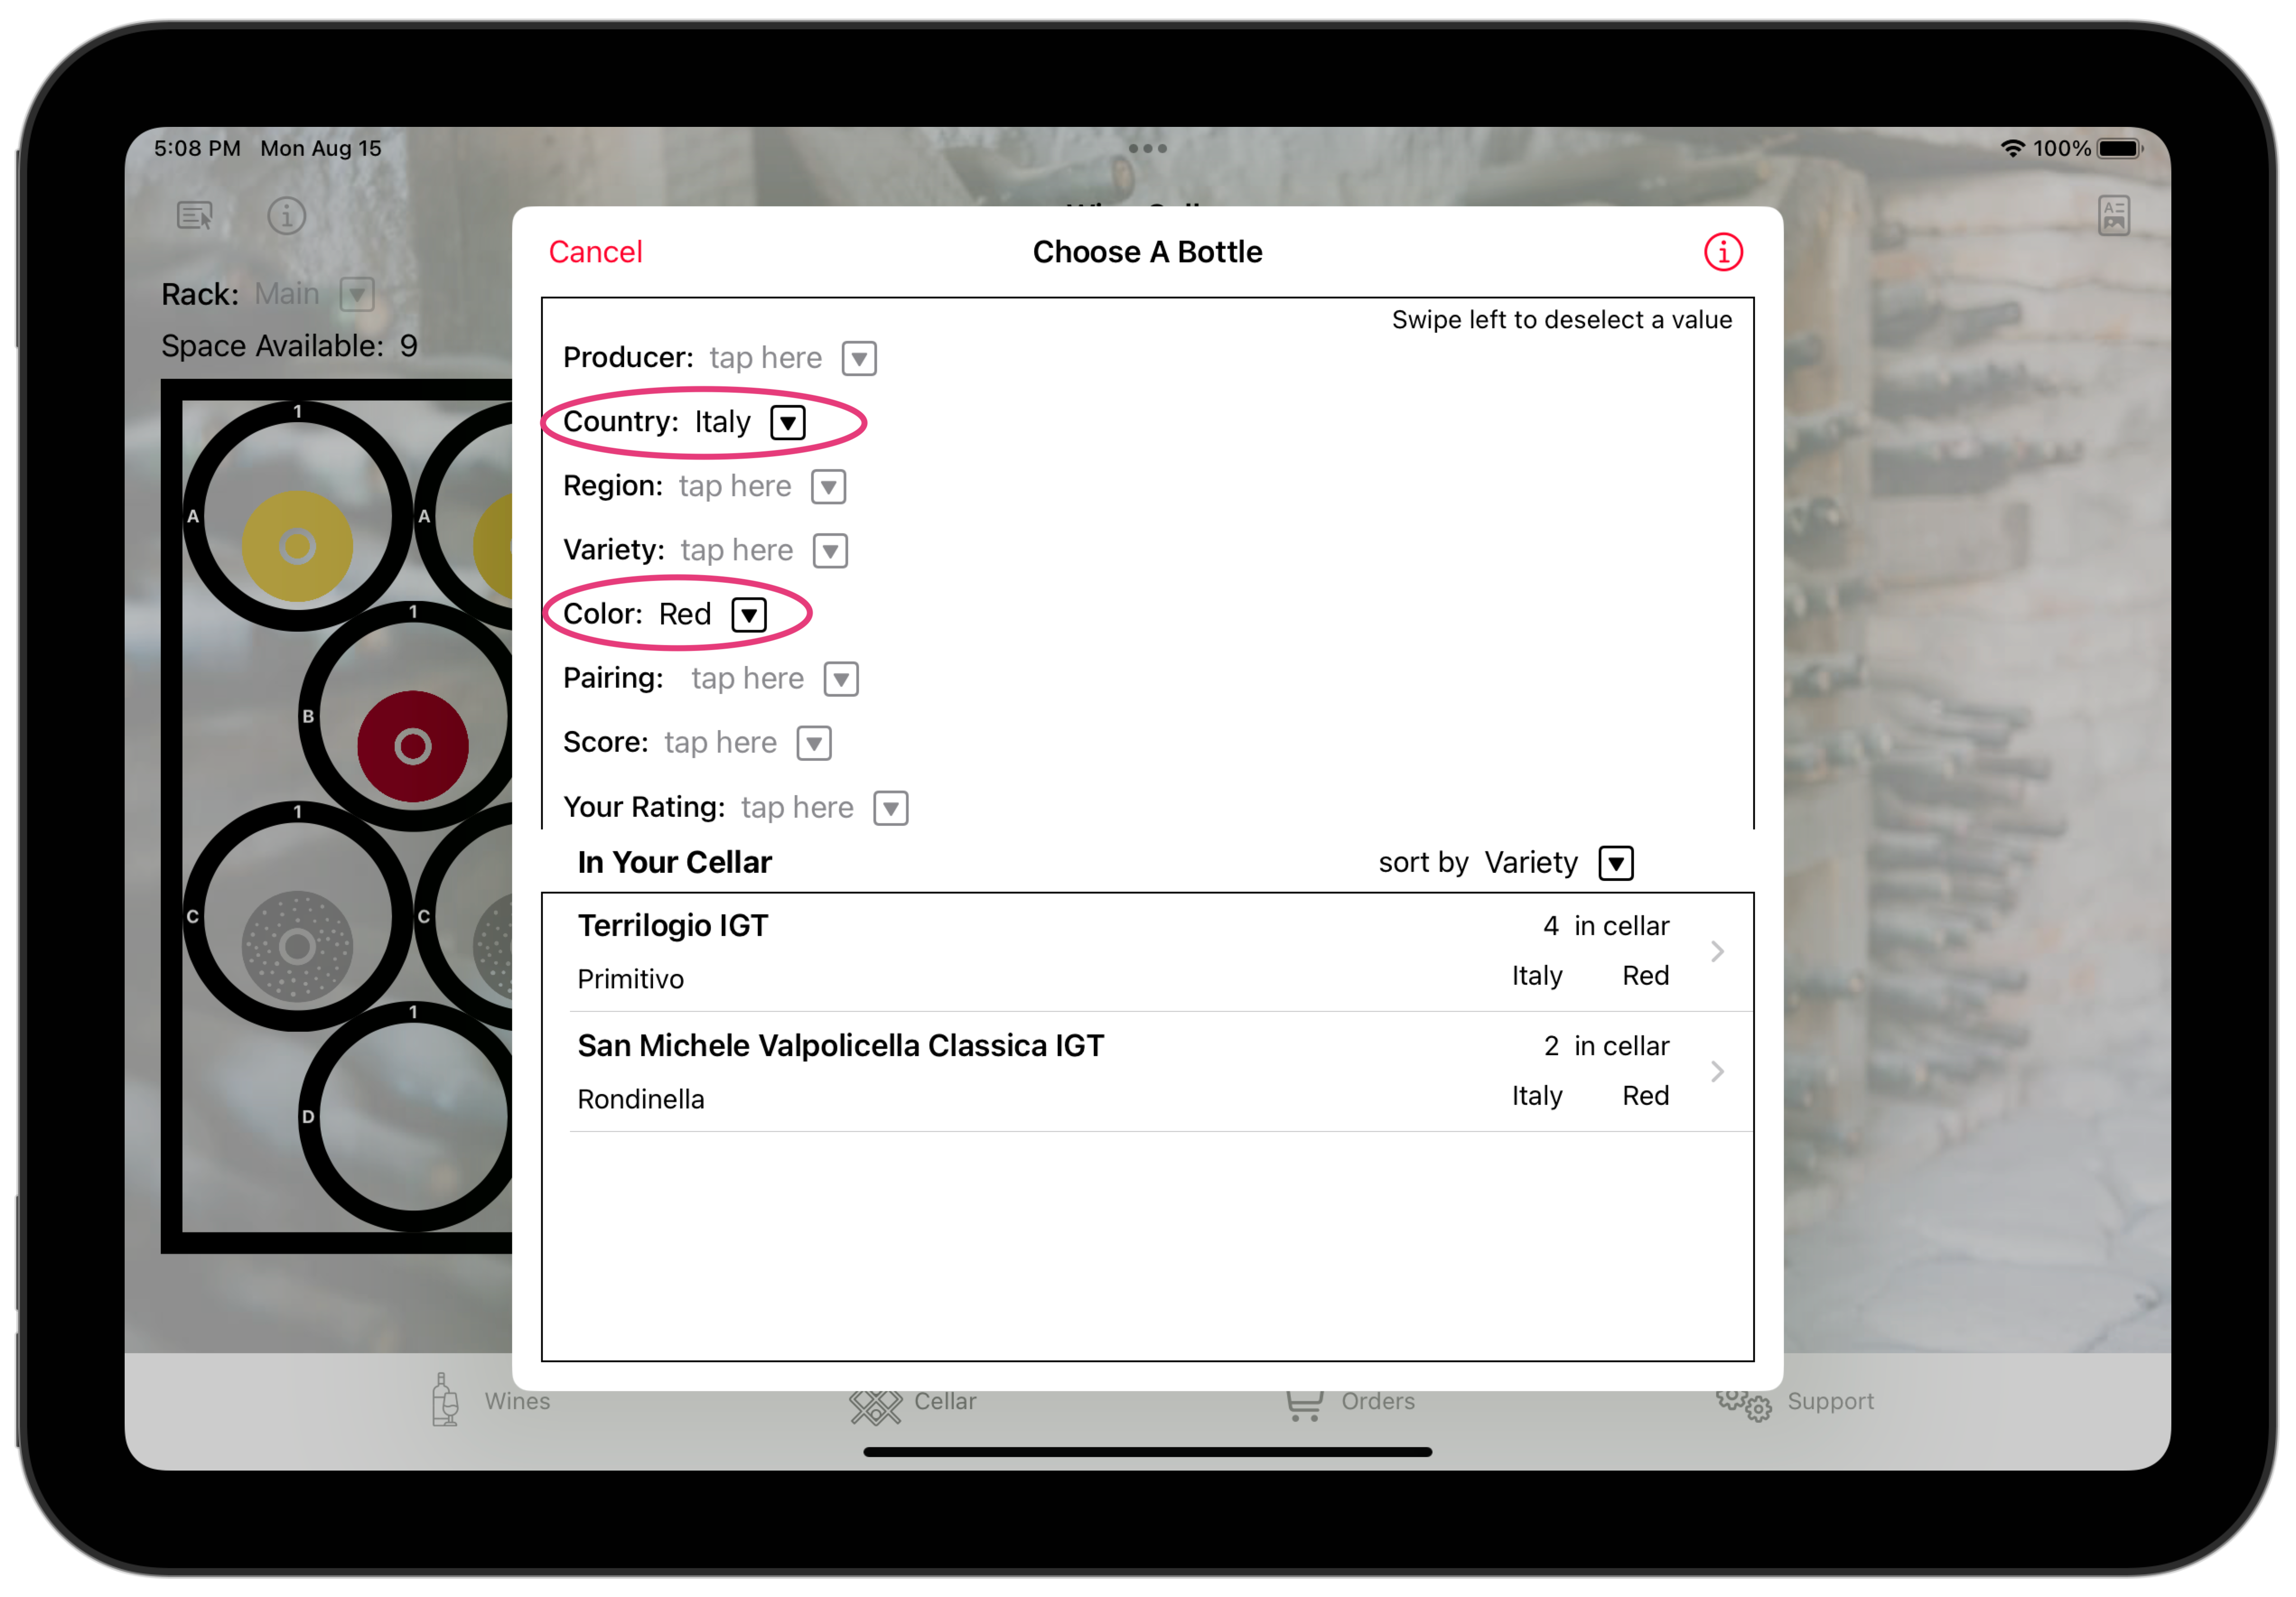
We can select the Primitivo by tapping it in the bottom section. Since there are more than one bottle available, we have a further choice — which bottle(s) we want.
Taking Inventory
Keeping Wine Corner up to date with your actual wine cellar takes a bit of persistence. It's pretty easy to forget to record a change every time you add or remove a bottle from your cellar. So it is possible that the record of your cellar in Wine Corner and the actual complement of bottles that are actually in it can be different.
We fix this by Taking Inventory.
- Tap the Menu button (top-left of the screen).
- Tap Take Inventory.
- The following dialog will appear.

The function starts with the first bin in the current rack. The display shows you what Wine Corner has in that bin. It then asks you if this is correct or incorrect.
If it is correct, tap the (green) checkmark button; the dialog will advance to the next bin.
If there is a discrepancy, tap the (red) X button; the dialog will offer options for what the bin actually contains.
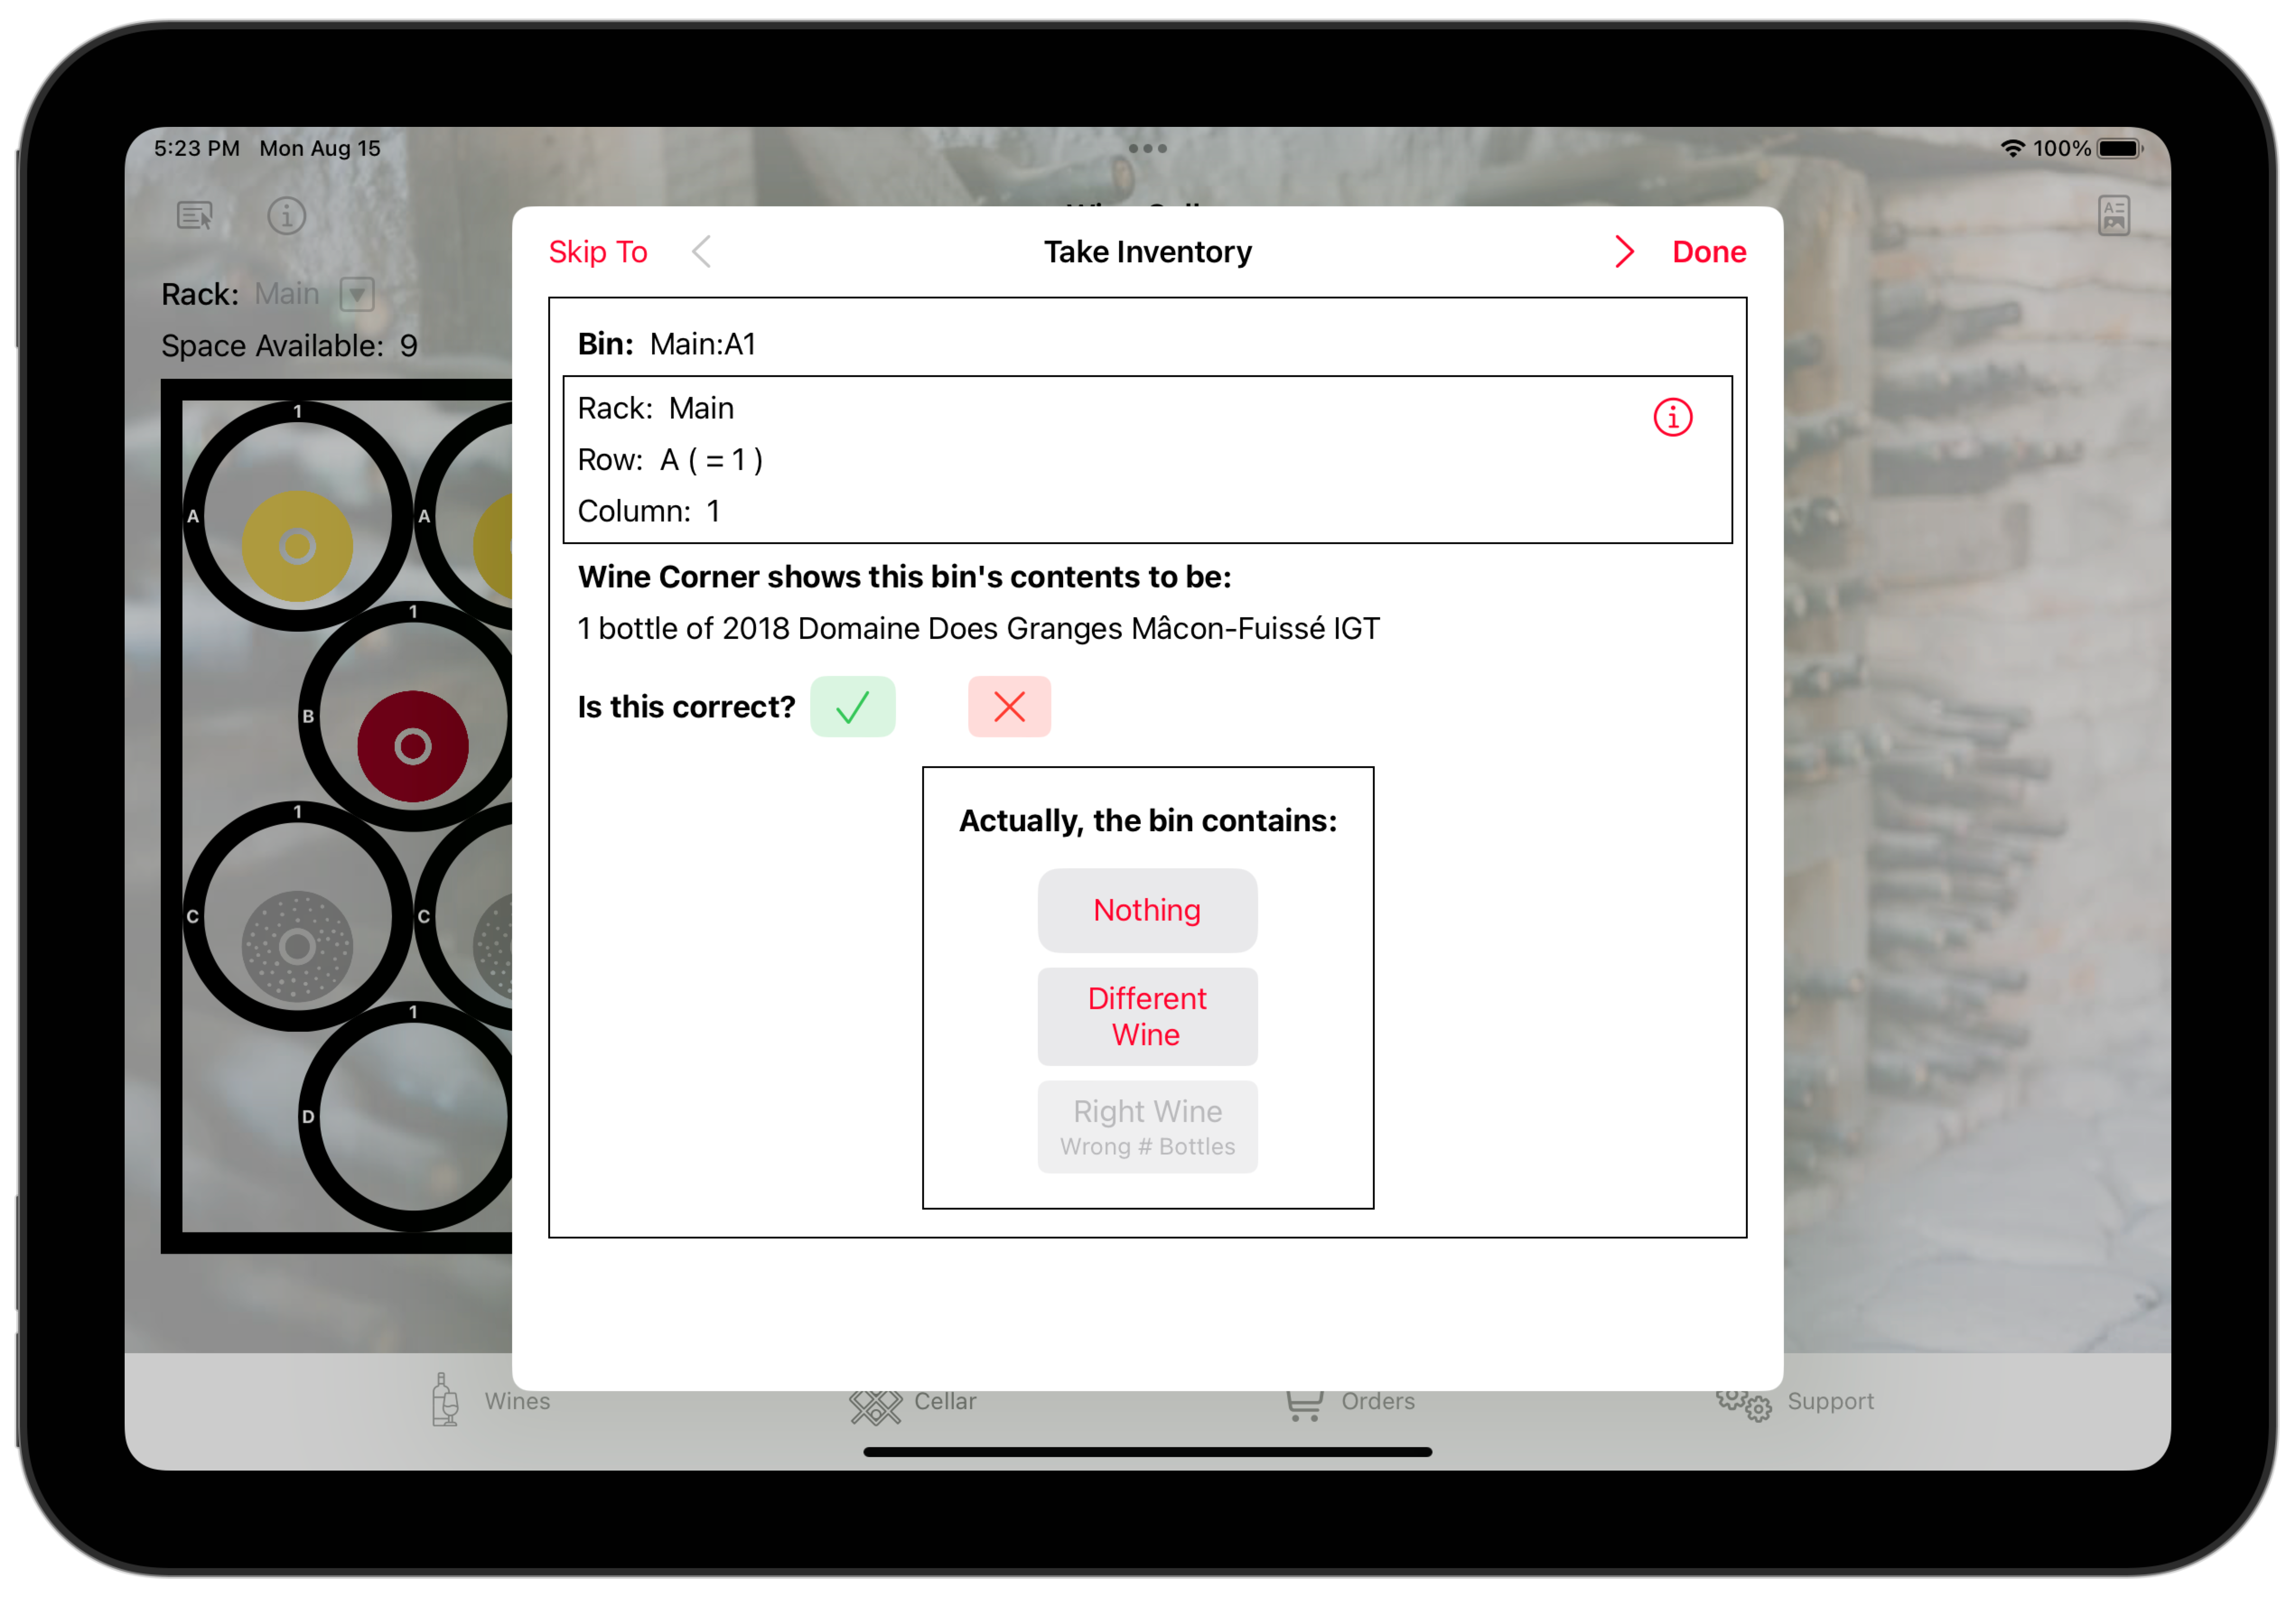
Select the correct option and if necessary, provide information about what is really in that bin.
You don't need to do a complete inventory at one sitting. Notice the buttons along the top of the dialog.
- Use the Skip To button to jump to a different bin.
- Use the < (previous) and > (next) buttons to move one bin at a time.
- And use the Done button to stop taking inventory
Updating Bottle State
Over time, bottles will be in a number of different states:
- On Order: You have ordered the bottle but haven't received yet.
- On Hand: The bottle is in your possession. This is a "catch-all" state; only on-hand bottles are eligible for adding to your cellar, and when you remove a bottle from your cellar, it is "on hand". On hand bottles are ready for you to do something with.
- In Cellar: The bottle is in your cellar.
- Open: The bottle is open, but unfinished.
- Finished: The bottle is empty. (Bottles you drink elsewhere are catagorized as "finished".)
- Gifted: You gave the bottle away. It is no longer in your possession.
- Other: The bottle is no longer available, but for some other reason. This could include breakage or some other event.
Wine Corner works best if its record of a bottle's state matches reality. You make this happen using this the update feature.
- Tap the Menu button (top-left of the screen).
- Tap Update Bottle State.
- The following dialog will appear.
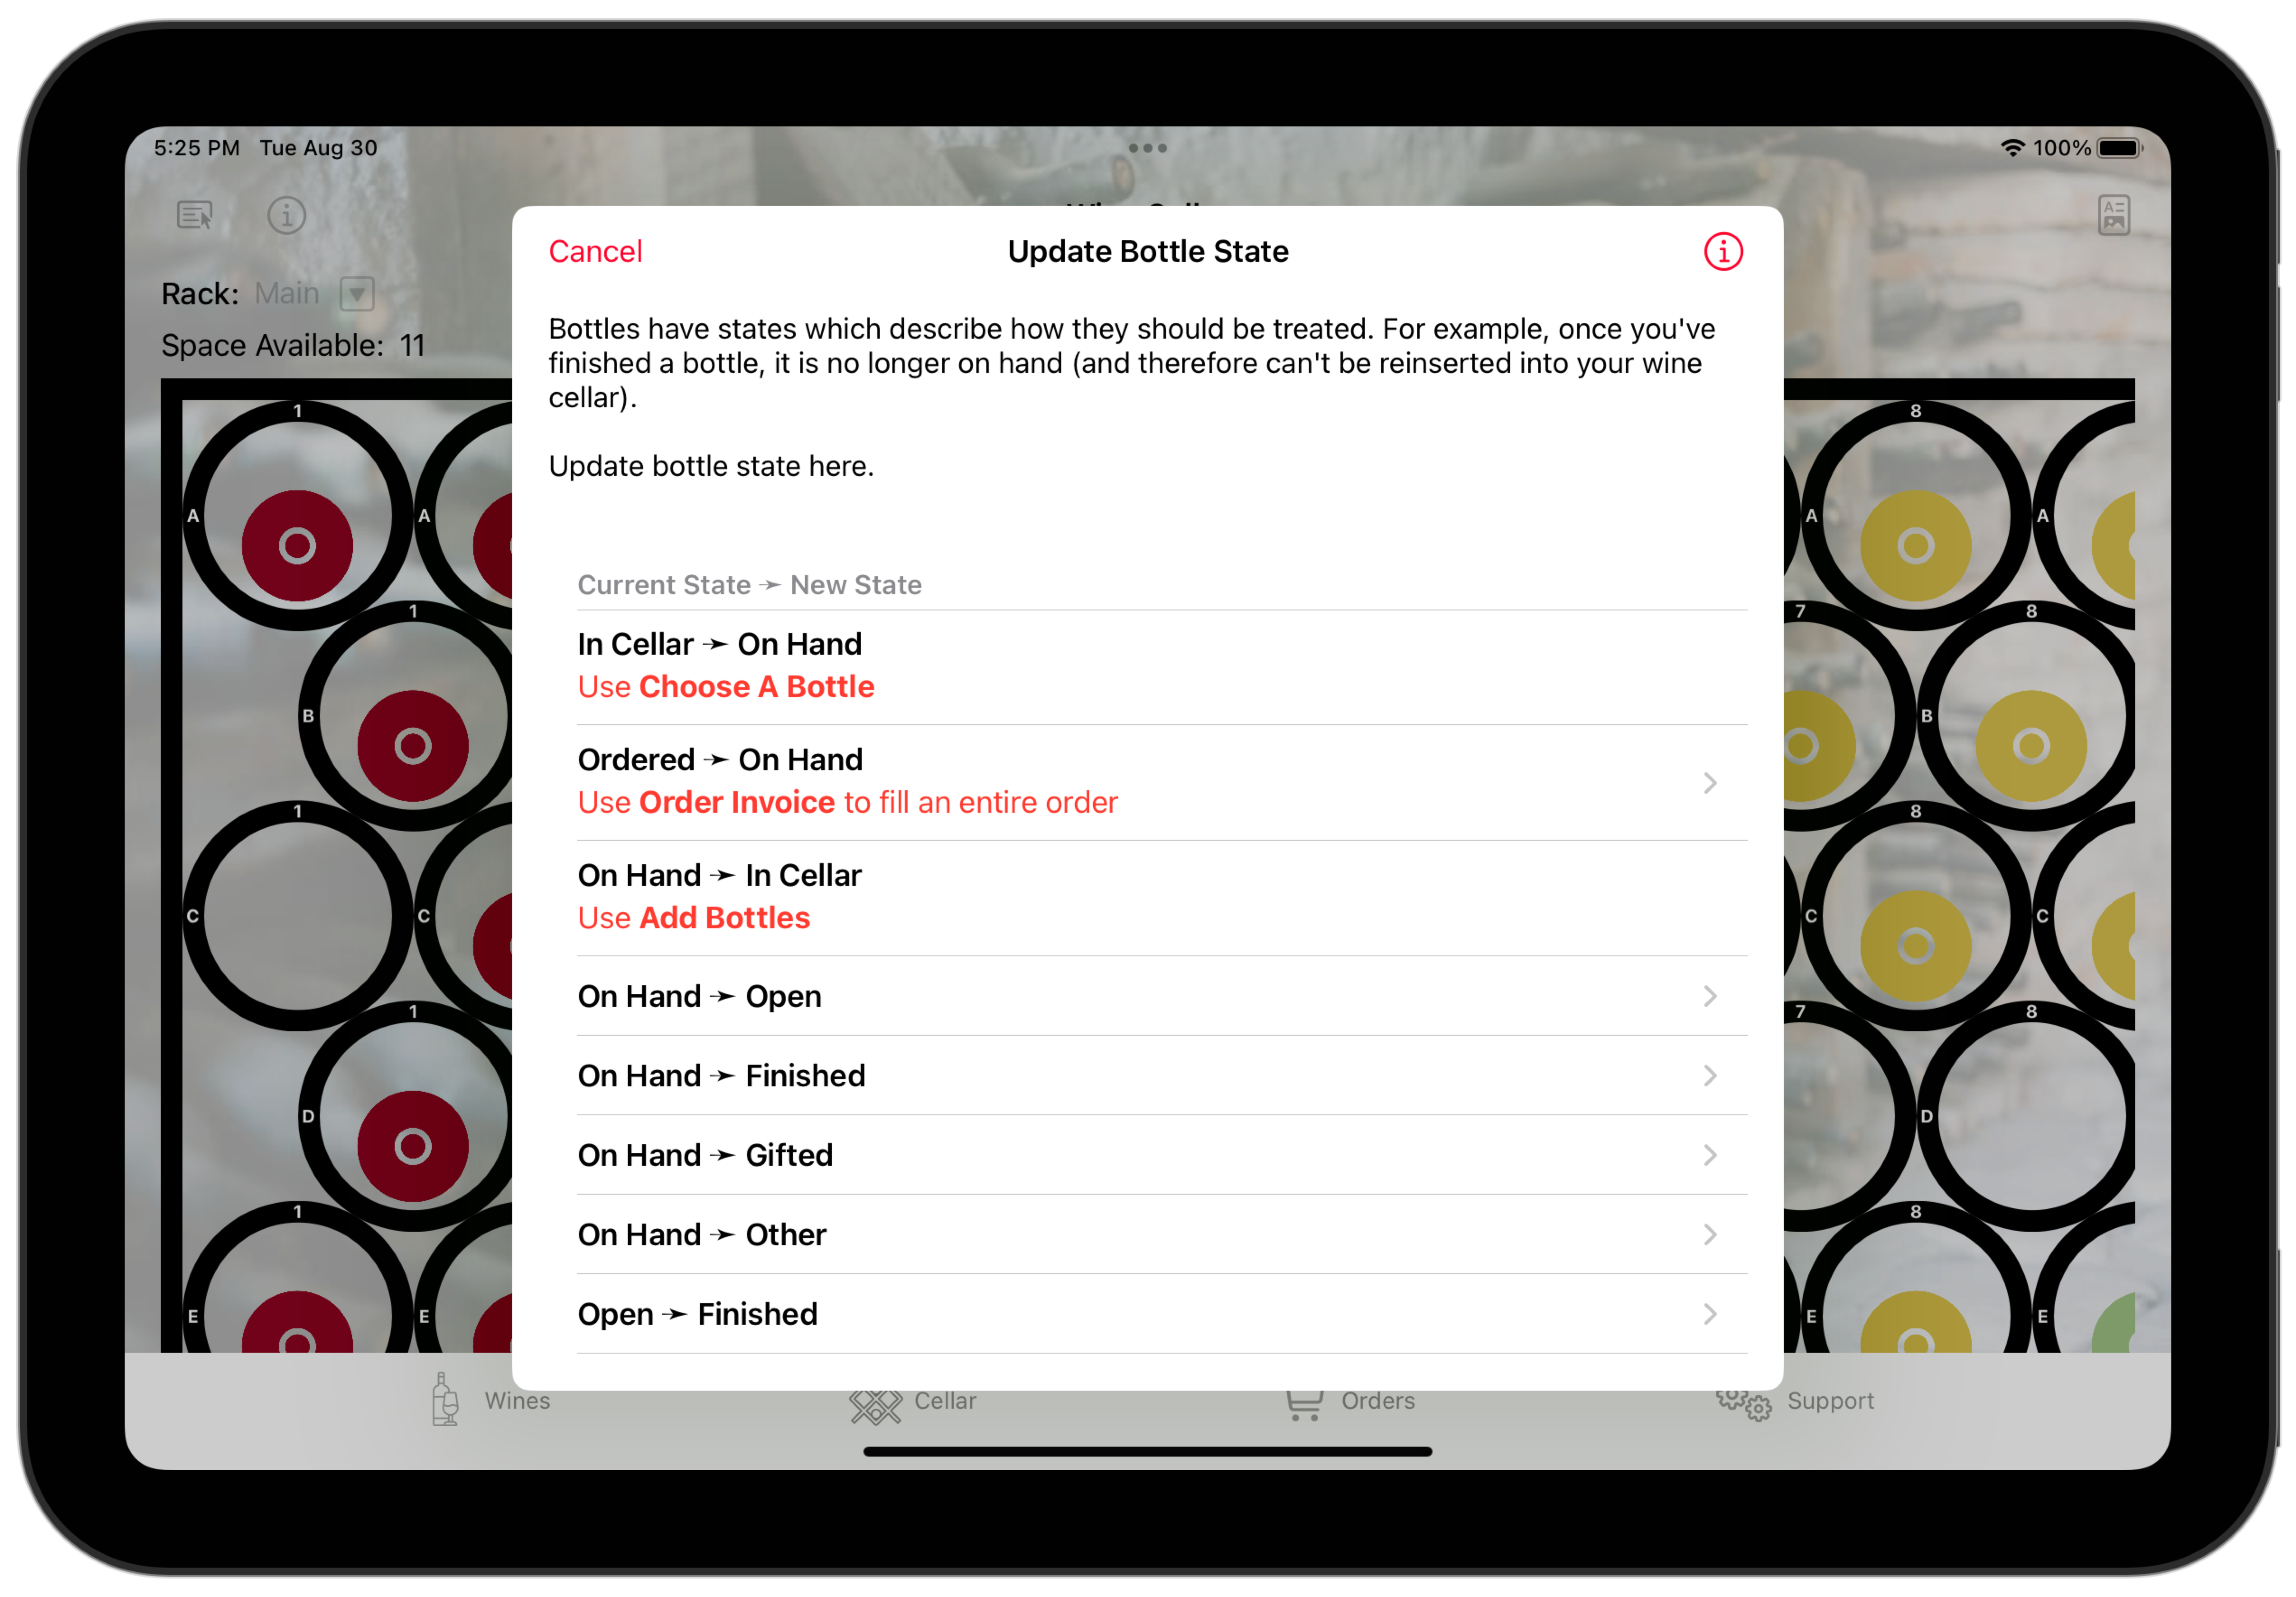
A list of logically-reasonable transitions is shown. (This is not a list of all possible transitions, just the ones that make sense.) Note that some transitions are handled elsewhere in Wine Corner; these cases are noted in red.
Tap the transition you want. For example, suppose you've just finished a bottle. You should change it's state from "open" to "finished". Tap on that item.
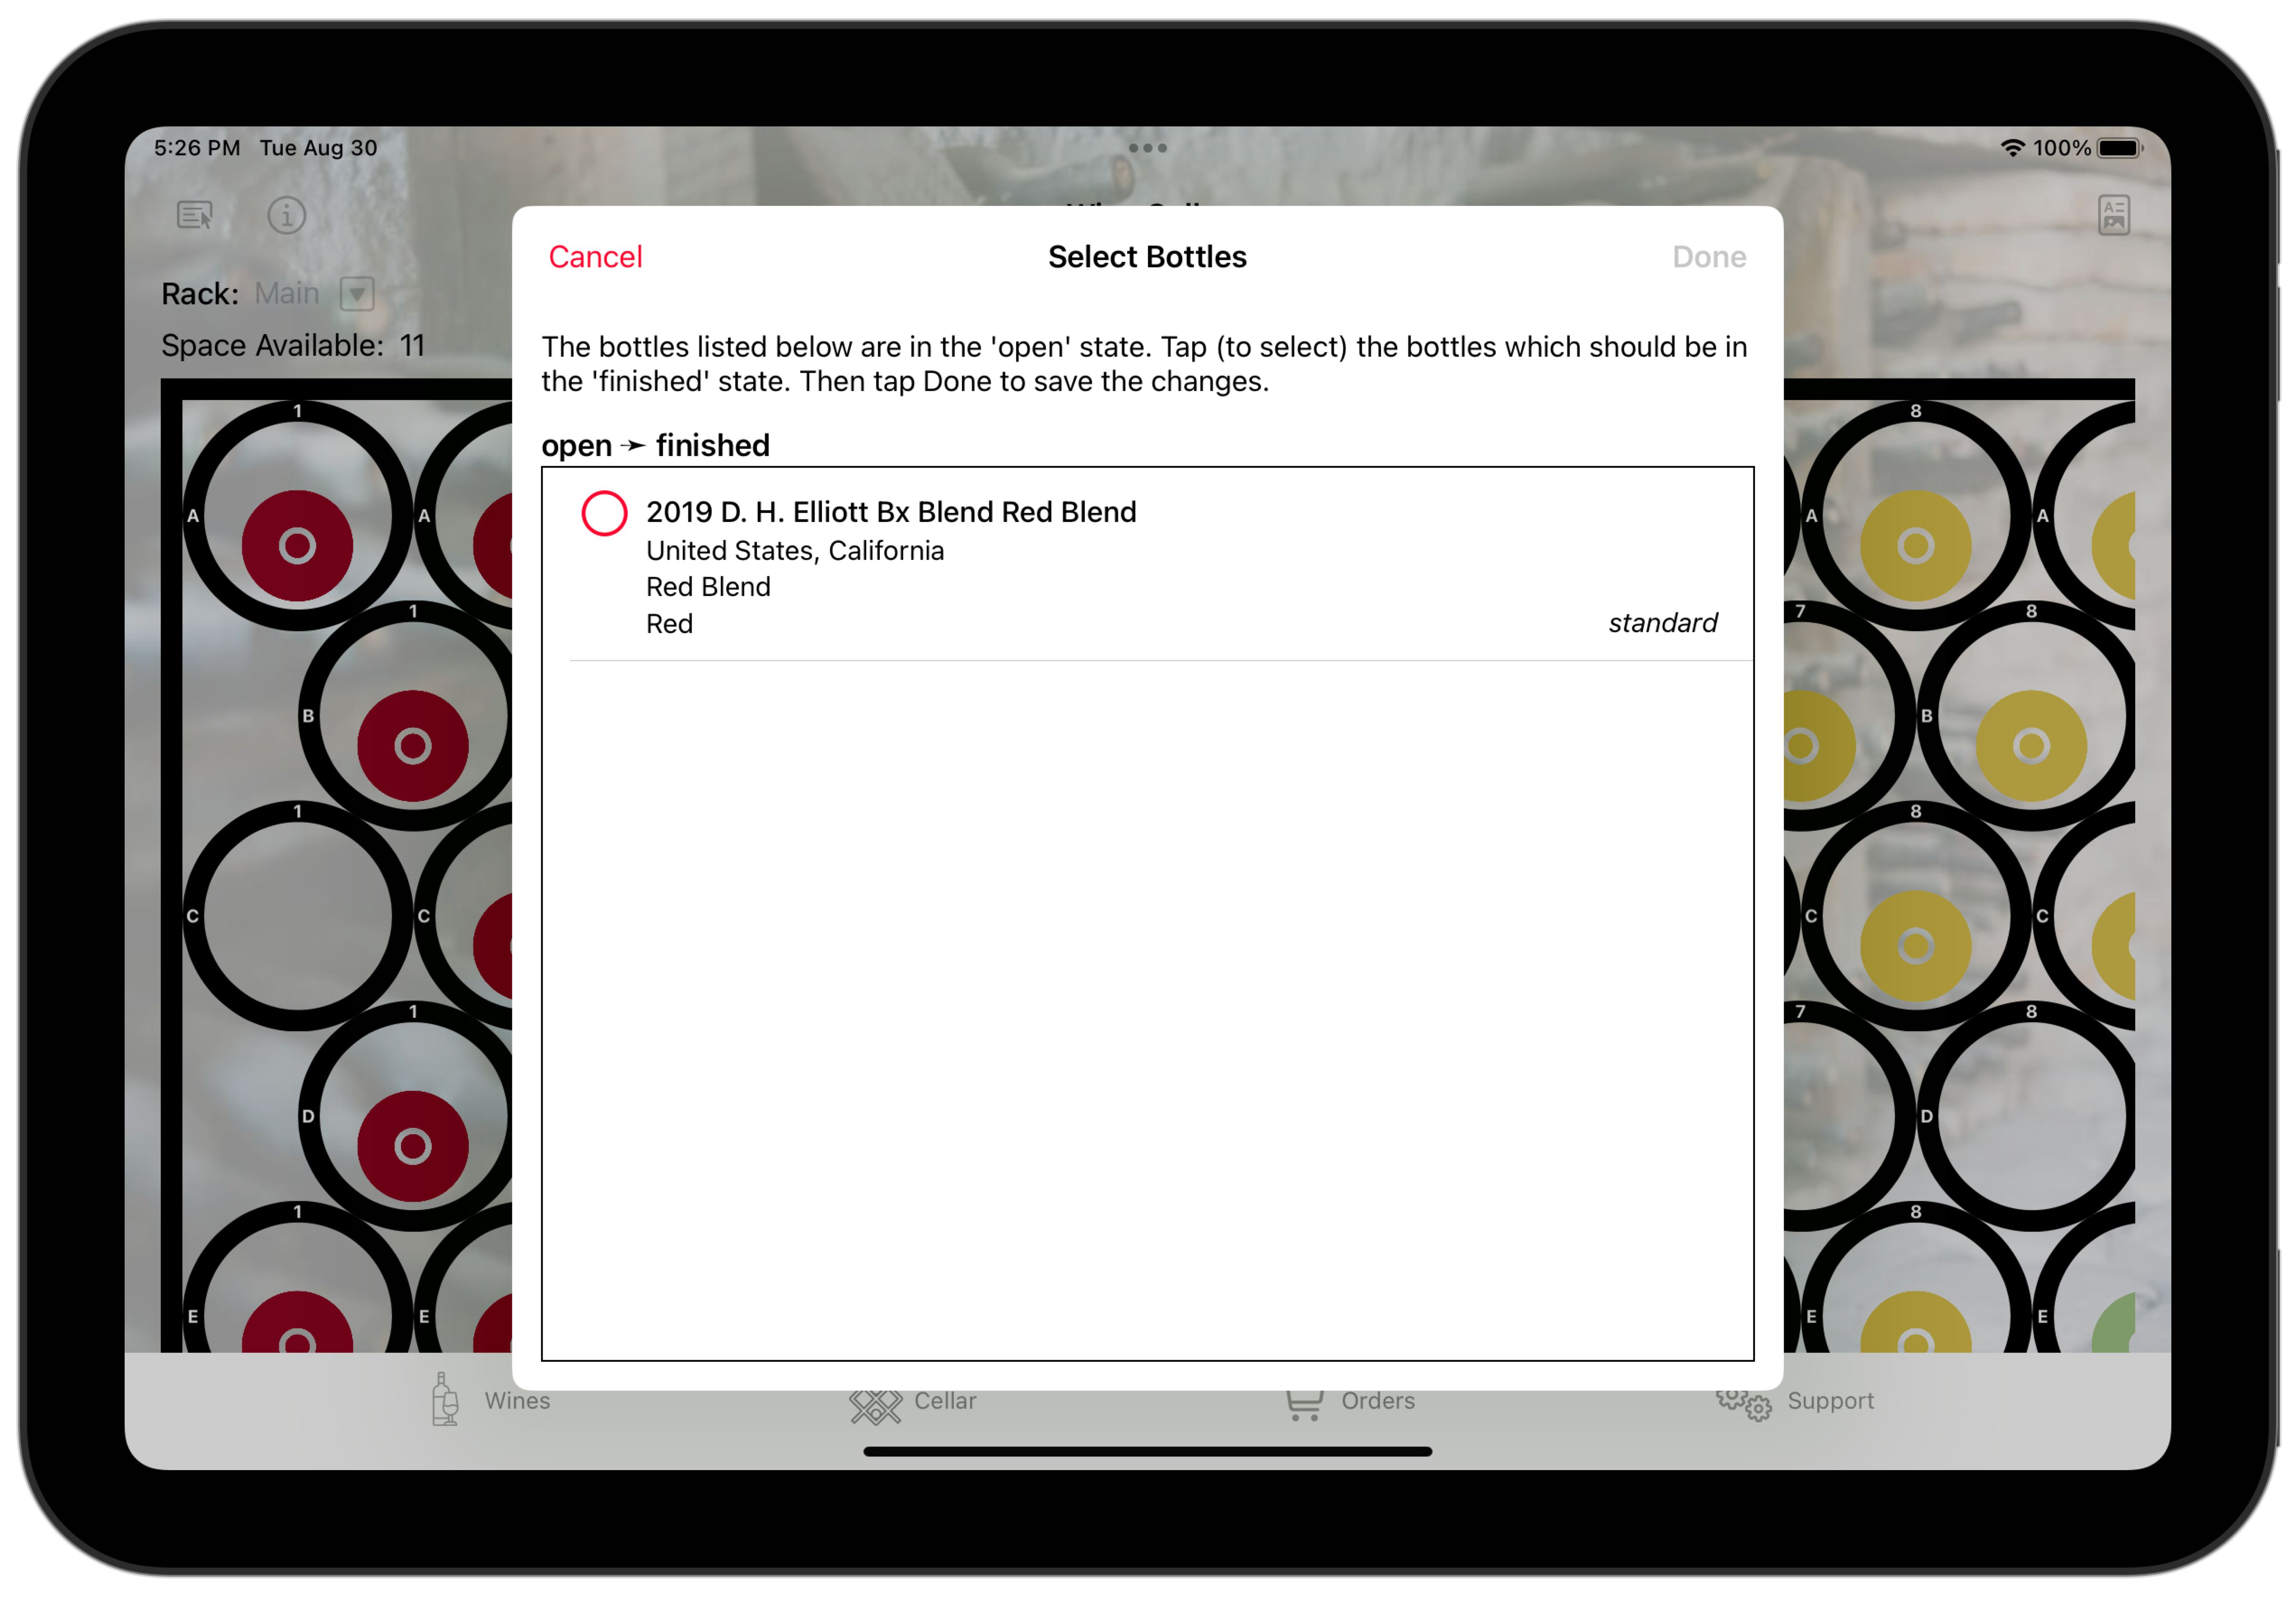
A new window opens showing all of the bottles in the open state. (Here, there's only one.) Select it and tap Done. The bottle's state will be changed.